 LayMesh
形状与绘制#
从基础图形到路径、填充、虚线、复合边框和轮廓融合。
基础形状#
圆角矩形#
矩形以 radius 设置圆角,并独立设置填充与描边。
tile = rect(size=(61 mm, 37 mm), border_radius=6 mm, fill="#d8f0ec", border_color="#087f8c", border_width=1 mm)page.add(tile, target=page.top_left, offset=(28 mm, 28 mm))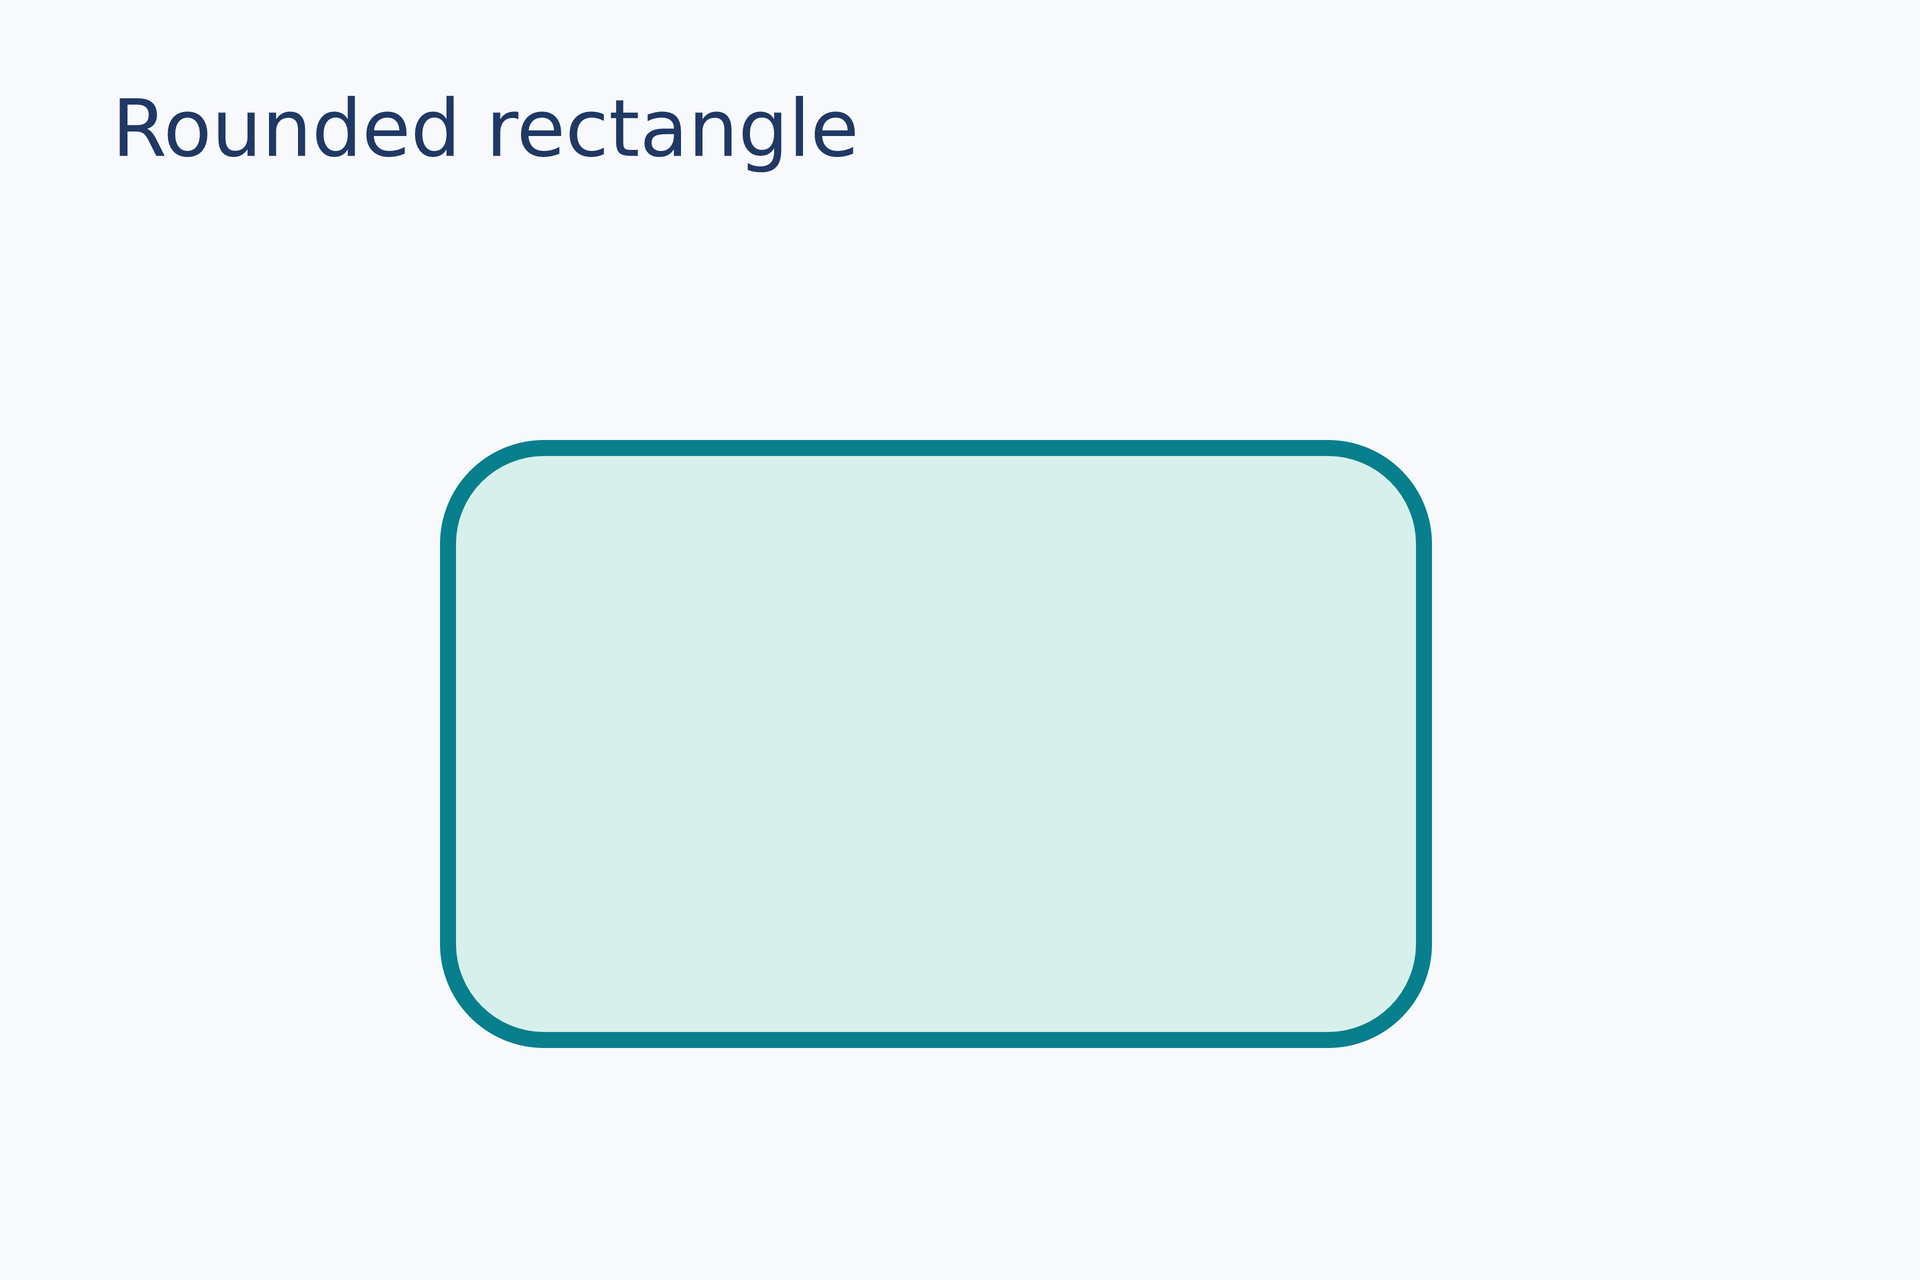
源码:rect.lay。
复现命令:laymesh validate examples/gallery/shapes/rect.lay;laymesh render examples/gallery/shapes/rect.lay -o rect.png --dpi 150。
实测:有效:examples/gallery/shapes/rect.lay(120 × 80 mm,2 个顶层实例);PNG 709 × 472 px,150 DPI;警告:无。
椭圆#
椭圆使用不同的宽和高,展示填充、描边与外接框。
oval = ellipse(size=(68 mm, 38 mm), fill="#f3be6b", border_color="#a66435", border_width=0.8 mm)page.add(oval, target=page.top_left, offset=(25 mm, 28 mm))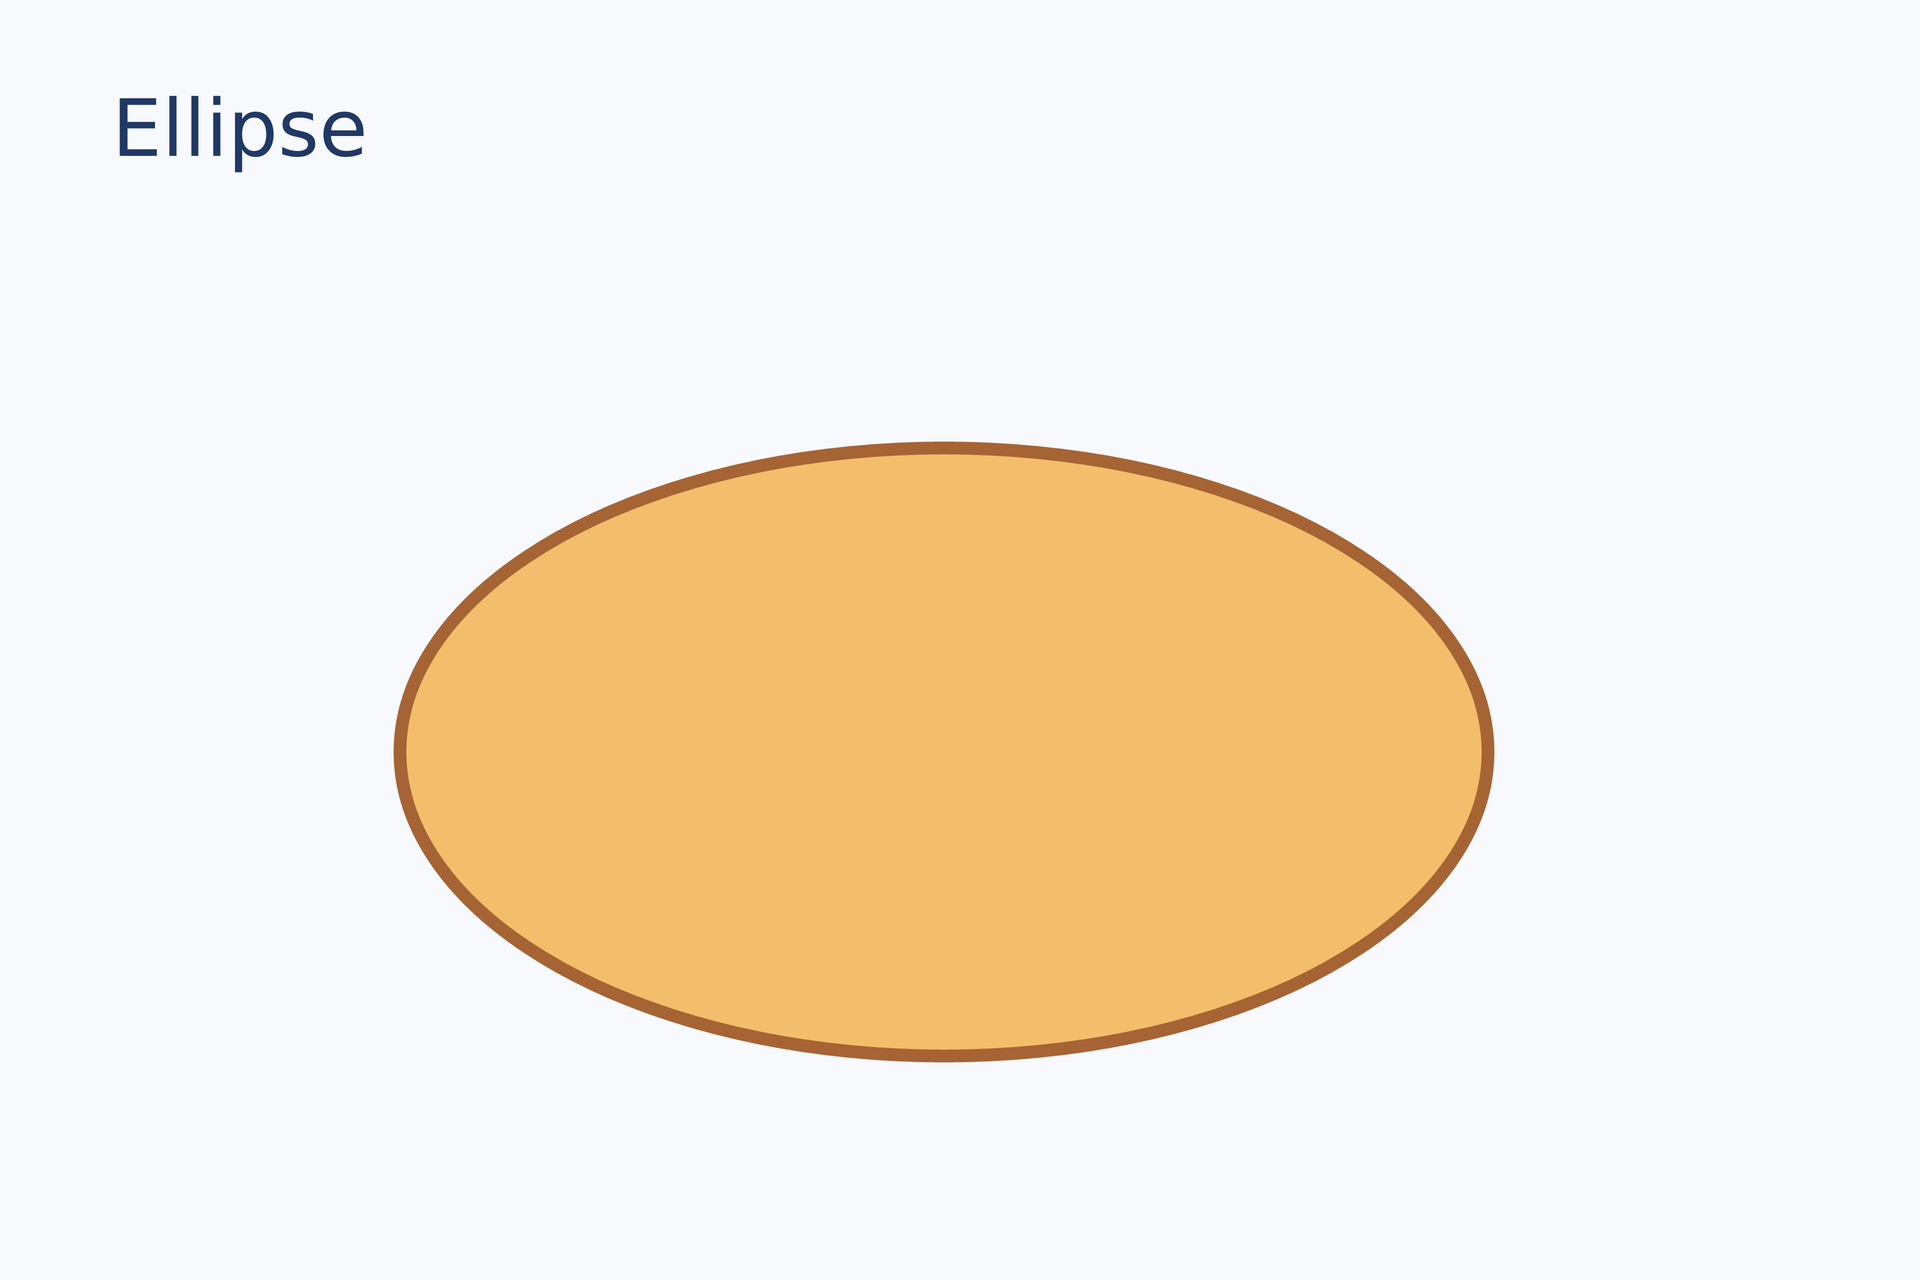
源码:ellipse.lay。
复现命令:laymesh validate examples/gallery/shapes/ellipse.lay;laymesh render examples/gallery/shapes/ellipse.lay -o ellipse.png --dpi 150。
实测:有效:examples/gallery/shapes/ellipse.lay(120 × 80 mm,2 个顶层实例);PNG 709 × 472 px,150 DPI;警告:无。
线与箭头#
一条直线和一条带箭头的斜线使用同一坐标体系。
page.add(line(dx=55 mm, dy=0 mm, line_color="#087f8c", line_width=1.2 mm), target=page.top_left, offset=(18 mm, 34 mm))page.add(line(end_head=head(), dx=55 mm, dy=13 mm, line_color="#e67563", line_width=1.2 mm), target=page.top_left, offset=(18 mm, 48 mm))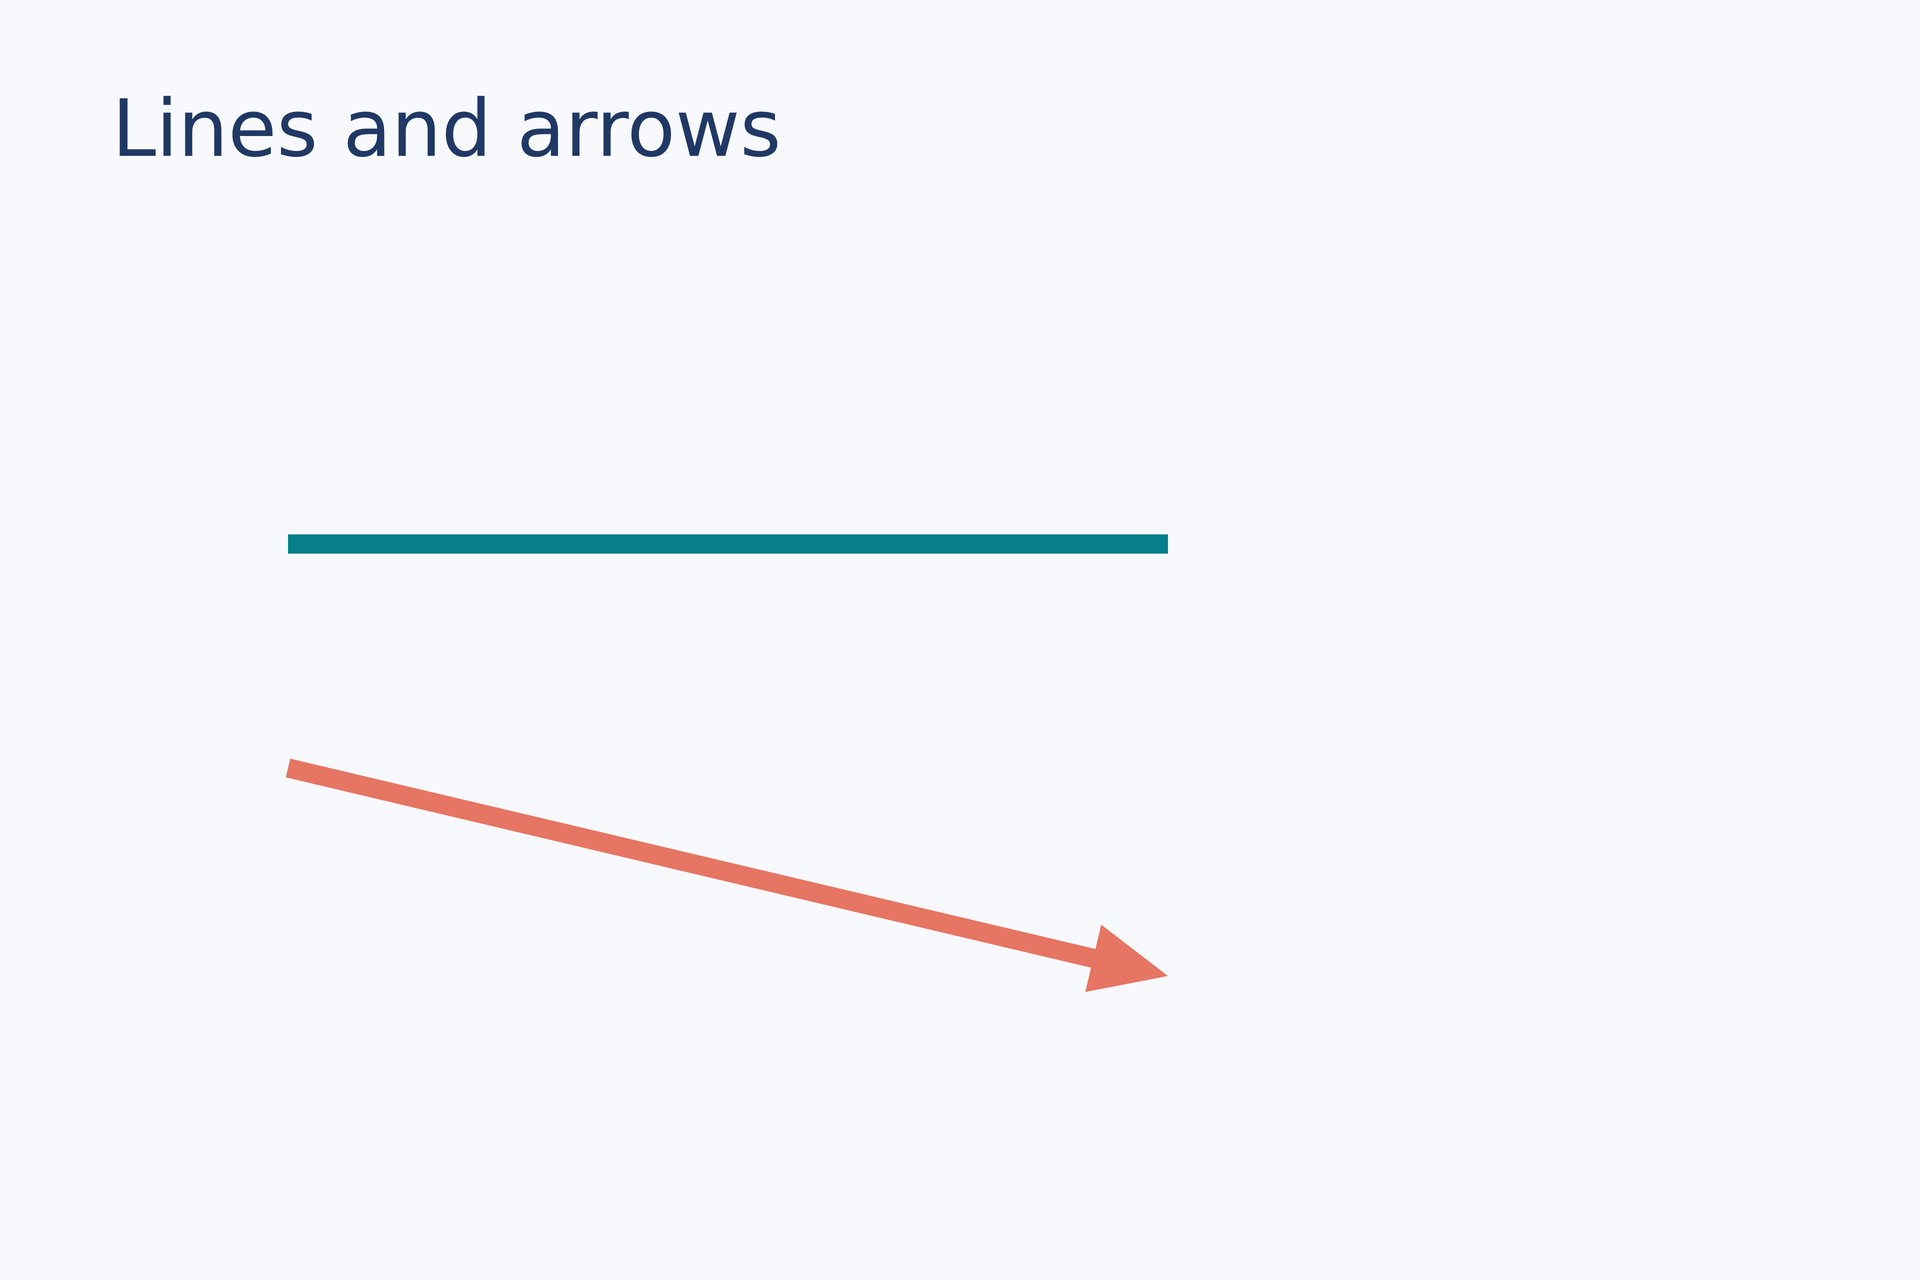
源码:line-arrow.lay。
复现命令:laymesh validate examples/gallery/shapes/line-arrow.lay;laymesh render examples/gallery/shapes/line-arrow.lay -o line-arrow.png --dpi 150。
实测:有效:examples/gallery/shapes/line-arrow.lay(120 × 80 mm,3 个顶层实例);PNG 709 × 472 px,150 DPI;警告:无。
预设图形#
多边形与折线#
多边形自动闭合;折线只沿所给点绘制。
area = polygon(points=[(0 mm, 26 mm), (20 mm, 0 mm), (41 mm, 9 mm), (50 mm, 28 mm), (12 mm, 35 mm)], fill="#a4dcd7", border_color="#087f8c", border_width=0.6 mm)page.add(area, target=page.top_left, offset=(8 mm, 30 mm))route = polyline(points=[(0 mm, 28 mm), (13 mm, 6 mm), (28 mm, 25 mm), (43 mm, 0 mm)], line_color="#e67563", line_width=1.4 mm, line_cap=round)page.add(route, target=page.top_left, offset=(66 mm, 33 mm))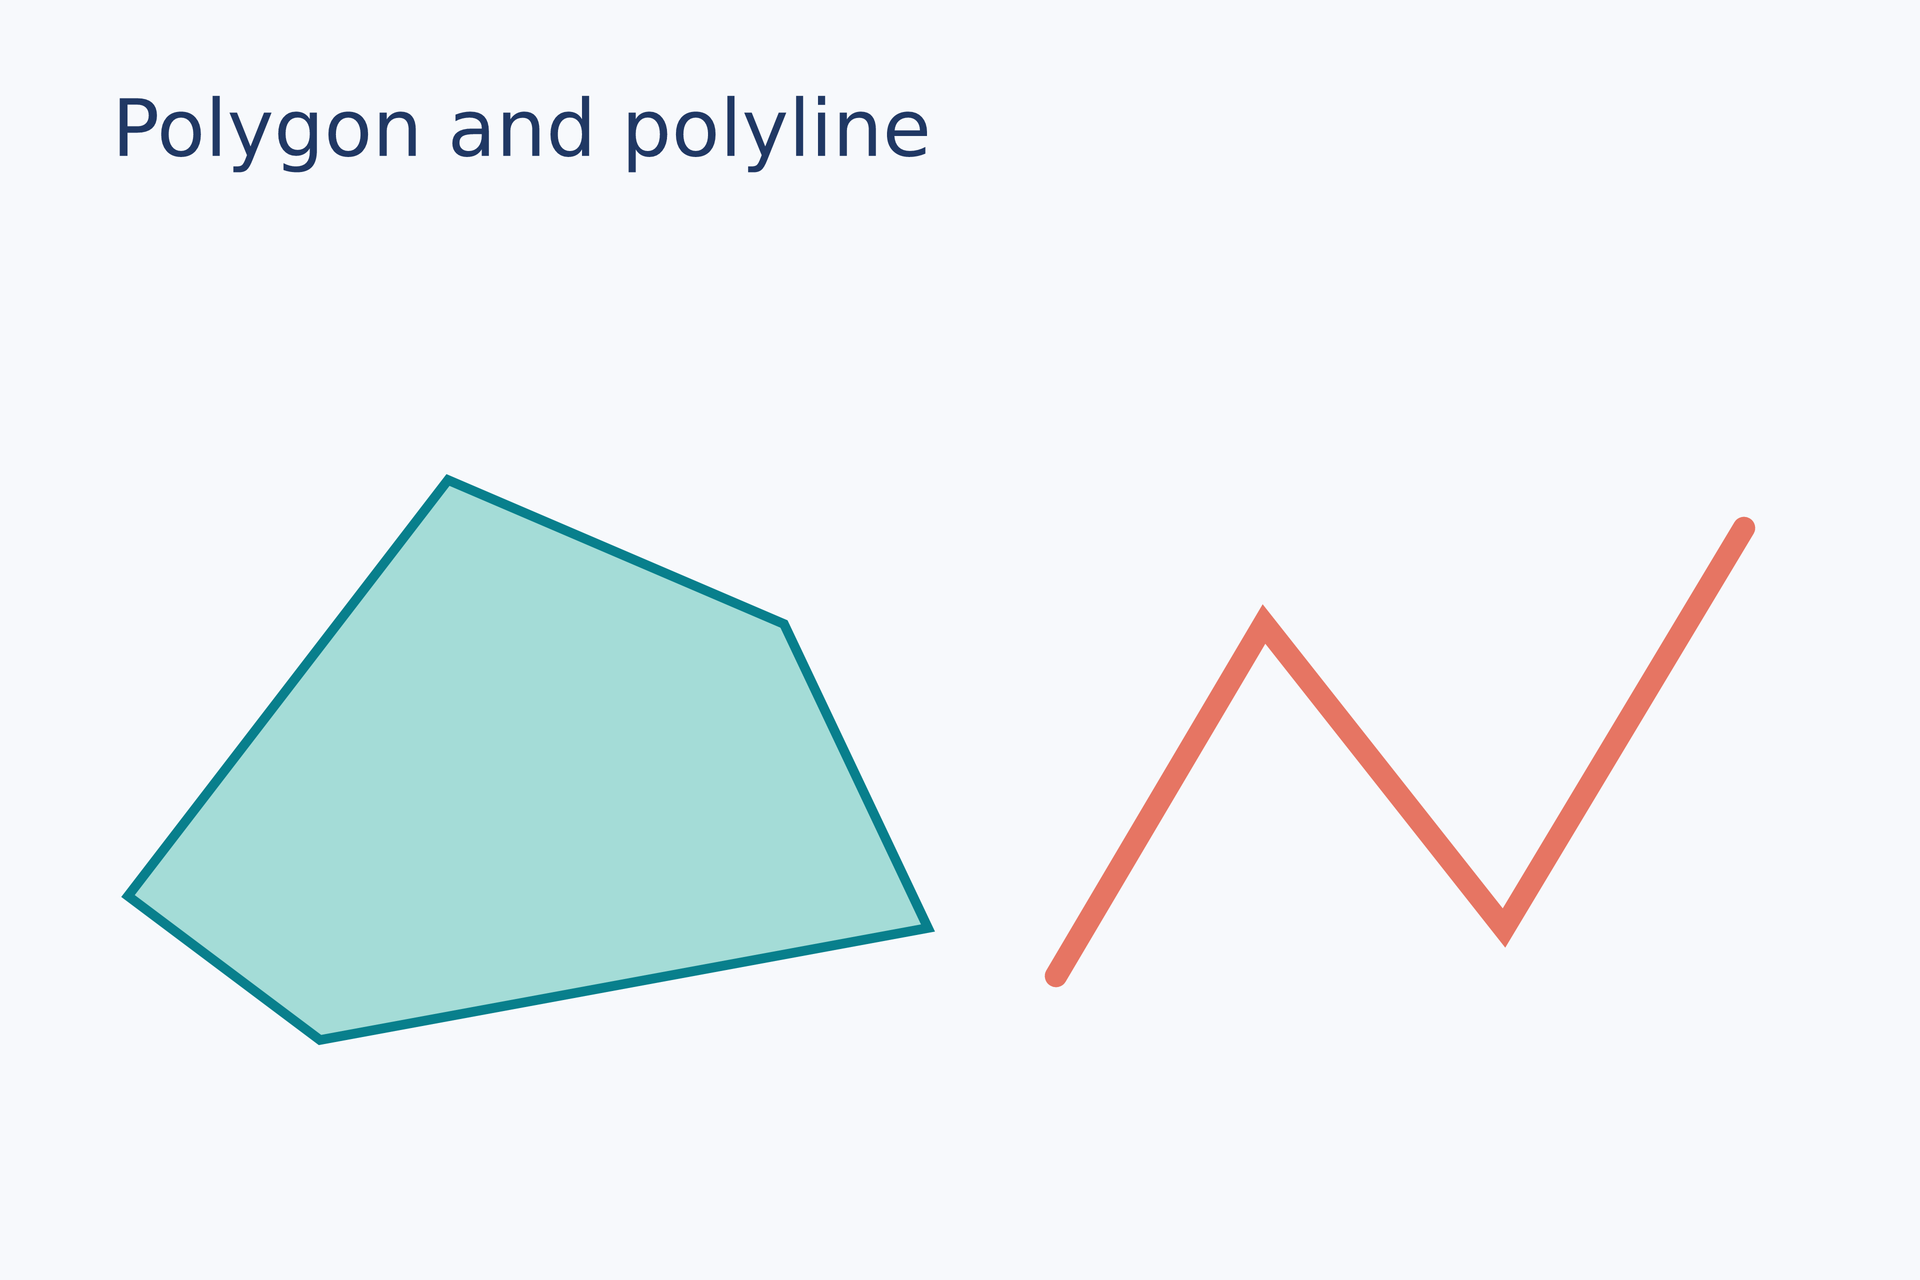
复现命令:laymesh validate examples/gallery/shapes/polygon-polyline.lay;laymesh render examples/gallery/shapes/polygon-polyline.lay -o polygon-polyline.png --dpi 150。
实测:有效:examples/gallery/shapes/polygon-polyline.lay(120 × 80 mm,3 个顶层实例);PNG 709 × 472 px,150 DPI;警告:无。
圆弧与扇形#
相同半径下对比开放圆弧与闭合扇形。
page.add(arc(radius=18 mm, start=-45 deg, end=220 deg, line_color="#087f8c", line_width=1.5 mm, line_cap=round), target=page.top_left, offset=(16 mm, 32 mm))page.add(sector(radius=18 mm, start=-40 deg, end=160 deg, fill="#f3be6b", border_color="#a66435", border_width=0.5 mm), target=page.top_left, offset=(68 mm, 32 mm))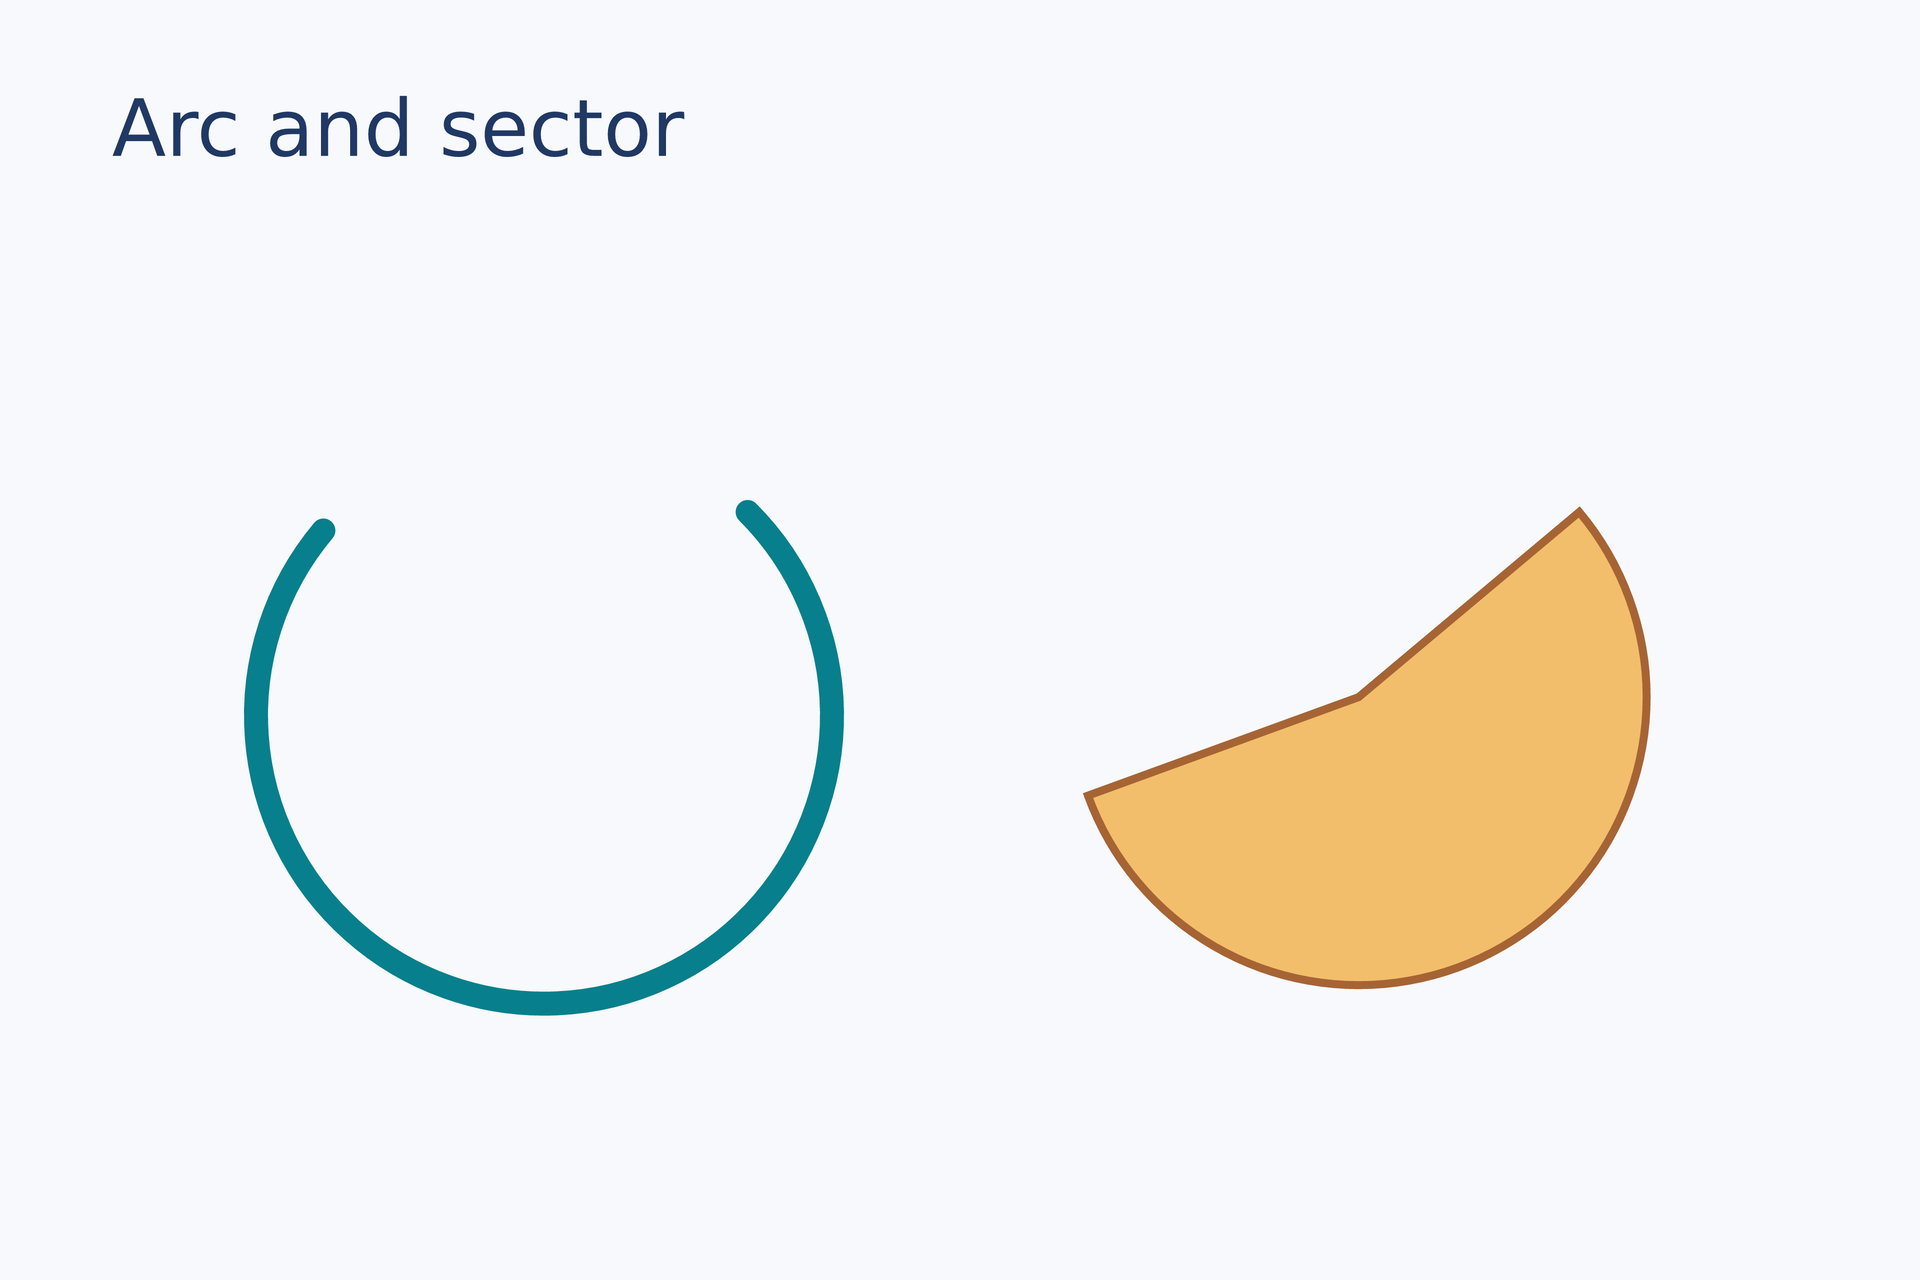
源码:arc-sector.lay。
复现命令:laymesh validate examples/gallery/shapes/arc-sector.lay;laymesh render examples/gallery/shapes/arc-sector.lay -o arc-sector.png --dpi 150。
实测:有效:examples/gallery/shapes/arc-sector.lay(120 × 80 mm,3 个顶层实例);PNG 709 × 472 px,150 DPI;警告:无。
星形与环形#
星形由内外半径确定,环形保留透明内孔。
page.add(star(points=7, outer_radius=20 mm, inner_radius=9 mm, fill="#f3be6b", border_color="#a66435", border_width=0.6 mm), target=page.top_left, offset=(15 mm, 31 mm))page.add(ring(outer_radius=20 mm, inner_radius=9 mm, fill="#70c4be", border_color="#087f8c", border_width=0.6 mm), target=page.top_left, offset=(65 mm, 31 mm))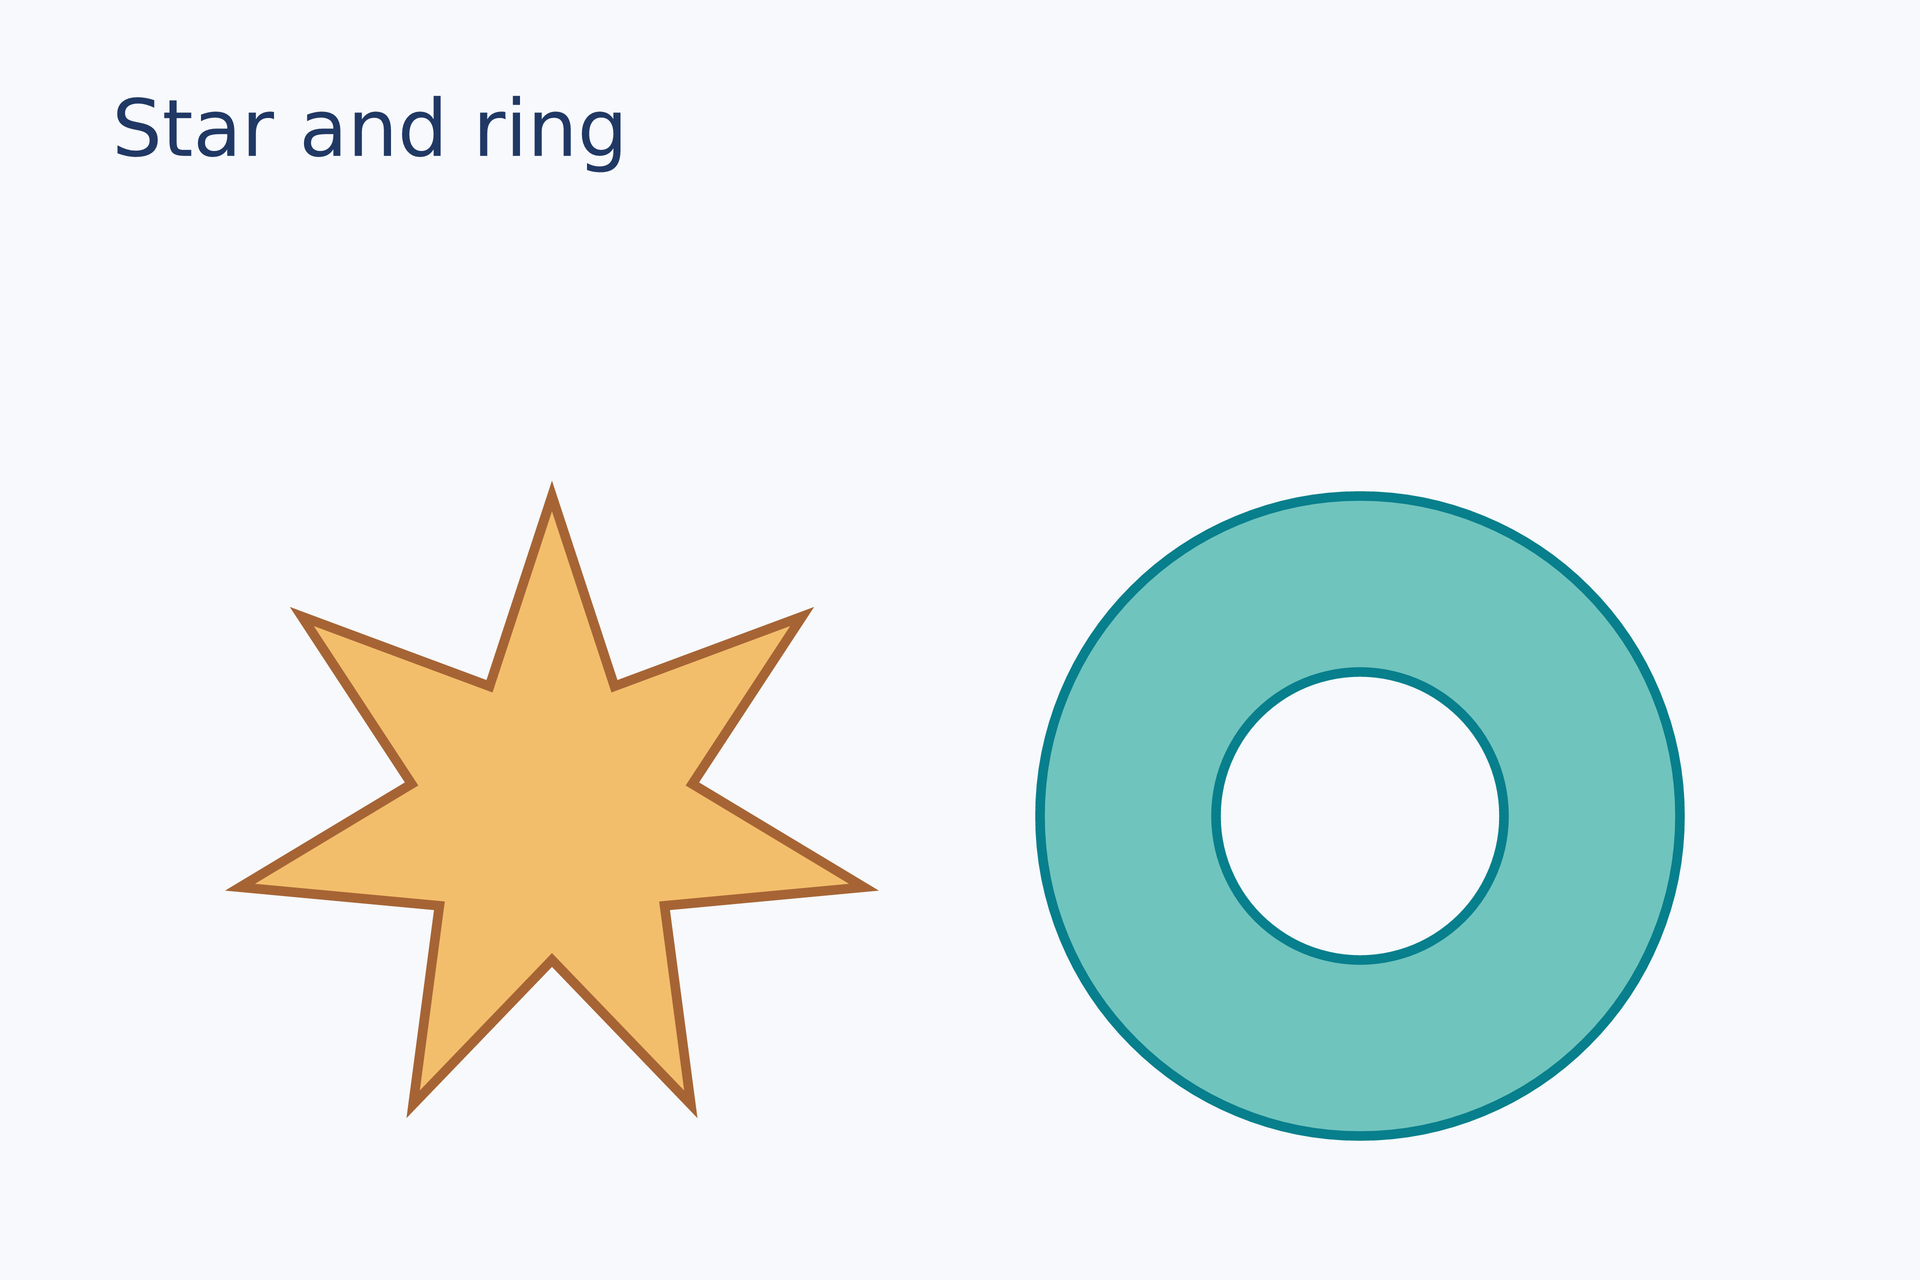
源码:star-ring.lay。
复现命令:laymesh validate examples/gallery/shapes/star-ring.lay;laymesh render examples/gallery/shapes/star-ring.lay -o star-ring.png --dpi 150。
实测:有效:examples/gallery/shapes/star-ring.lay(120 × 80 mm,3 个顶层实例);PNG 709 × 472 px,150 DPI;警告:无。
路径与填充#
路径命令#
直线、二次/三次贝塞尔曲线和椭圆弧连接成单条路径。
curve = path(commands=[ move_to(0 mm, 27 mm), line_to(12 mm, 5 mm), quad_to(23 mm, -5 mm, 35 mm, 10 mm), cubic_to(44 mm, 24 mm, 54 mm, 7 mm, 65 mm, 13 mm), arc_to(12 mm, 12 mm, 0 deg, false, true, 82 mm, 27 mm)], fill="none", border_color="#087f8c", border_width=1.5 mm, border_cap=round, border_join=round)page.add(curve, target=page.top_left, offset=(13 mm, 31 mm))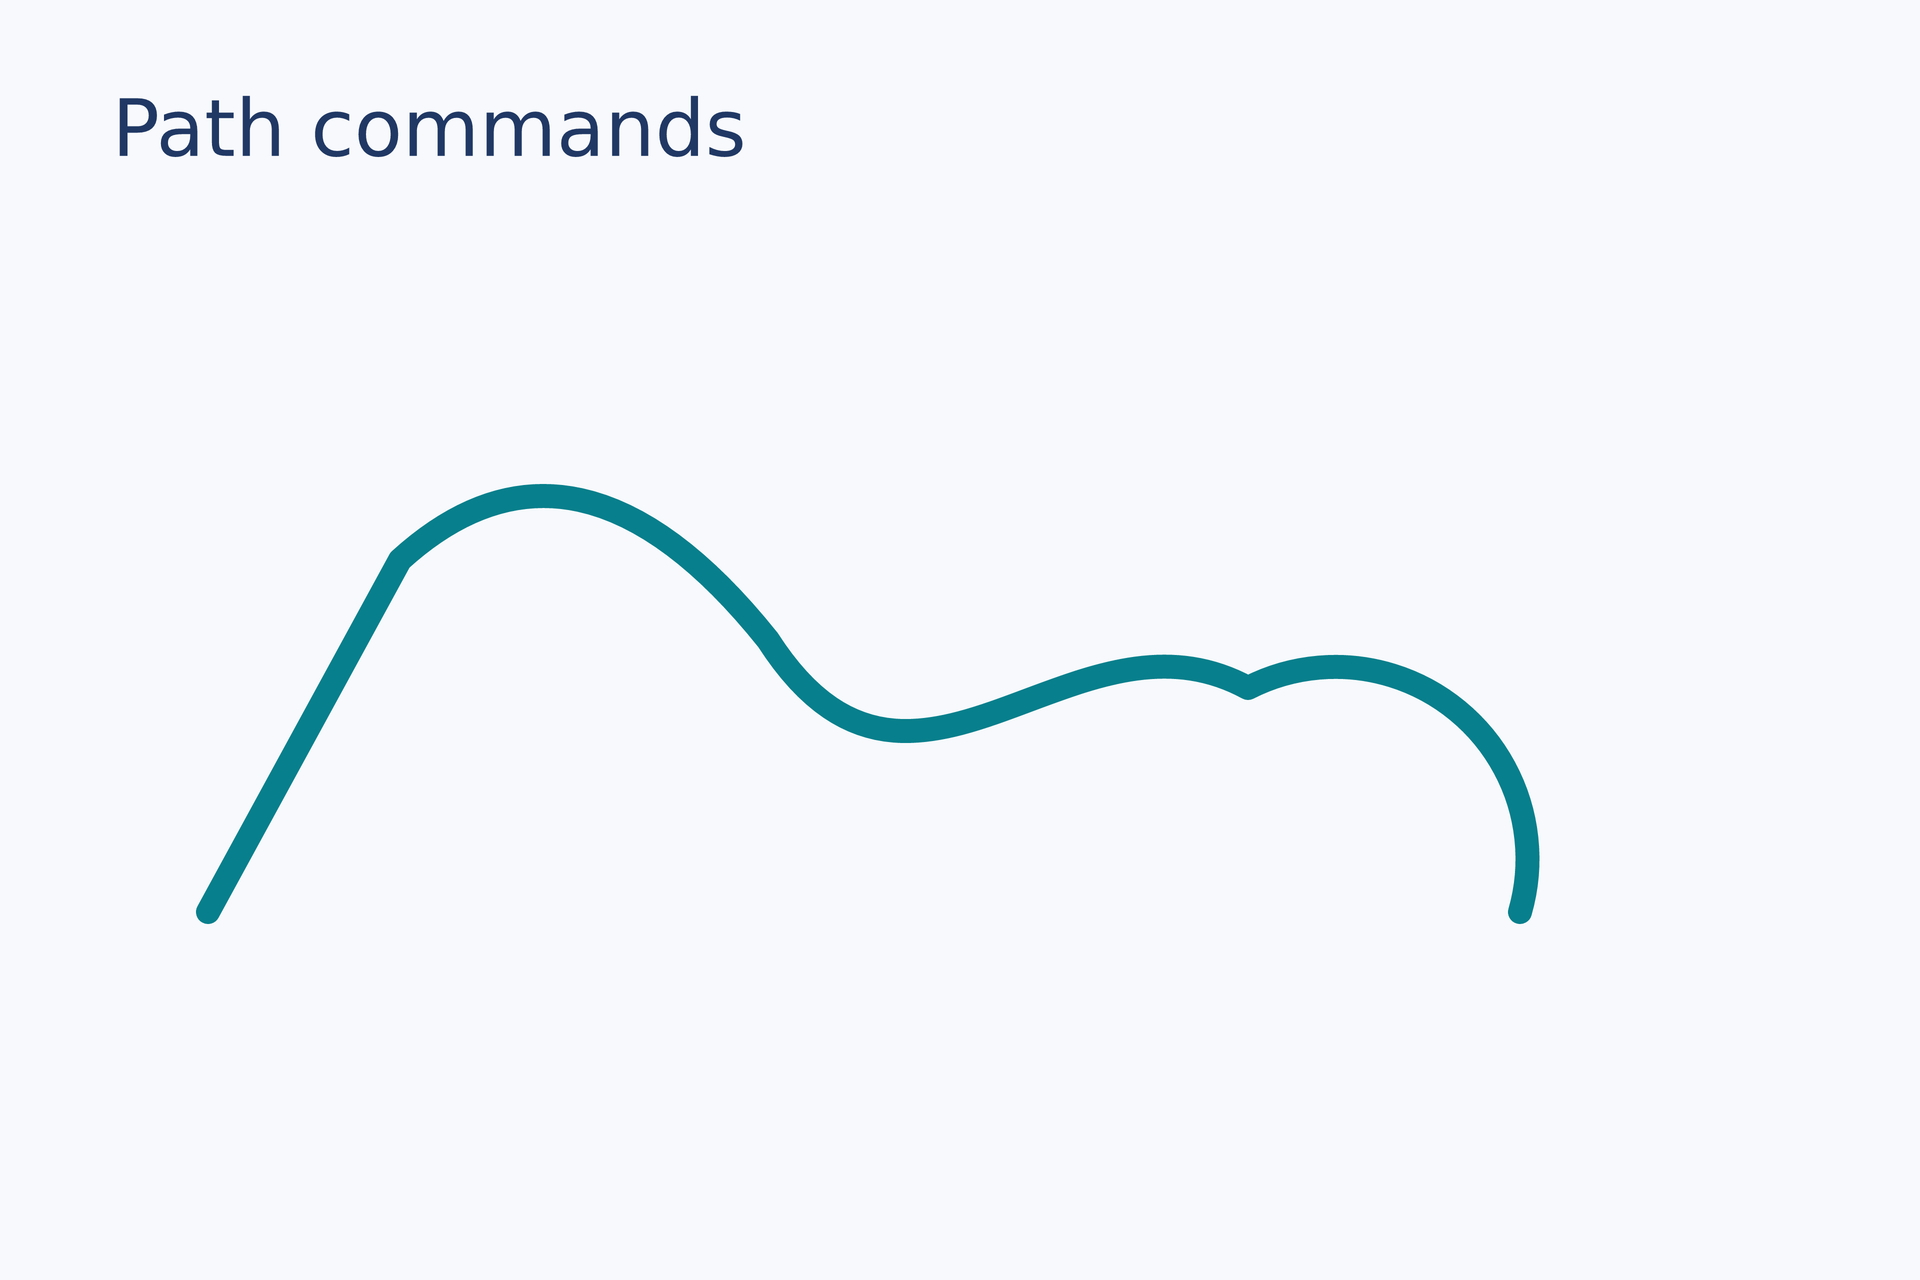
复现命令:laymesh validate examples/gallery/shapes/path-commands.lay;laymesh render examples/gallery/shapes/path-commands.lay -o path-commands.png --dpi 150。
实测:有效:examples/gallery/shapes/path-commands.lay(120 × 80 mm,2 个顶层实例);PNG 709 × 472 px,150 DPI;警告:无。
偶奇填充孔洞#
同一路径中的内外子路径用 evenodd 留出透明孔。
frame = path(commands=[ move_to(0 mm, 0 mm), line_to(62 mm, 0 mm), line_to(62 mm, 42 mm), line_to(0 mm, 42 mm), close(), move_to(19 mm, 12 mm), line_to(43 mm, 12 mm), line_to(43 mm, 30 mm), line_to(19 mm, 30 mm), close()], fill="#087f8c", fill_rule=evenodd, border_color="#203864", border_width=0.5 mm)page.add(frame, target=page.top_left, offset=(27 mm, 27 mm))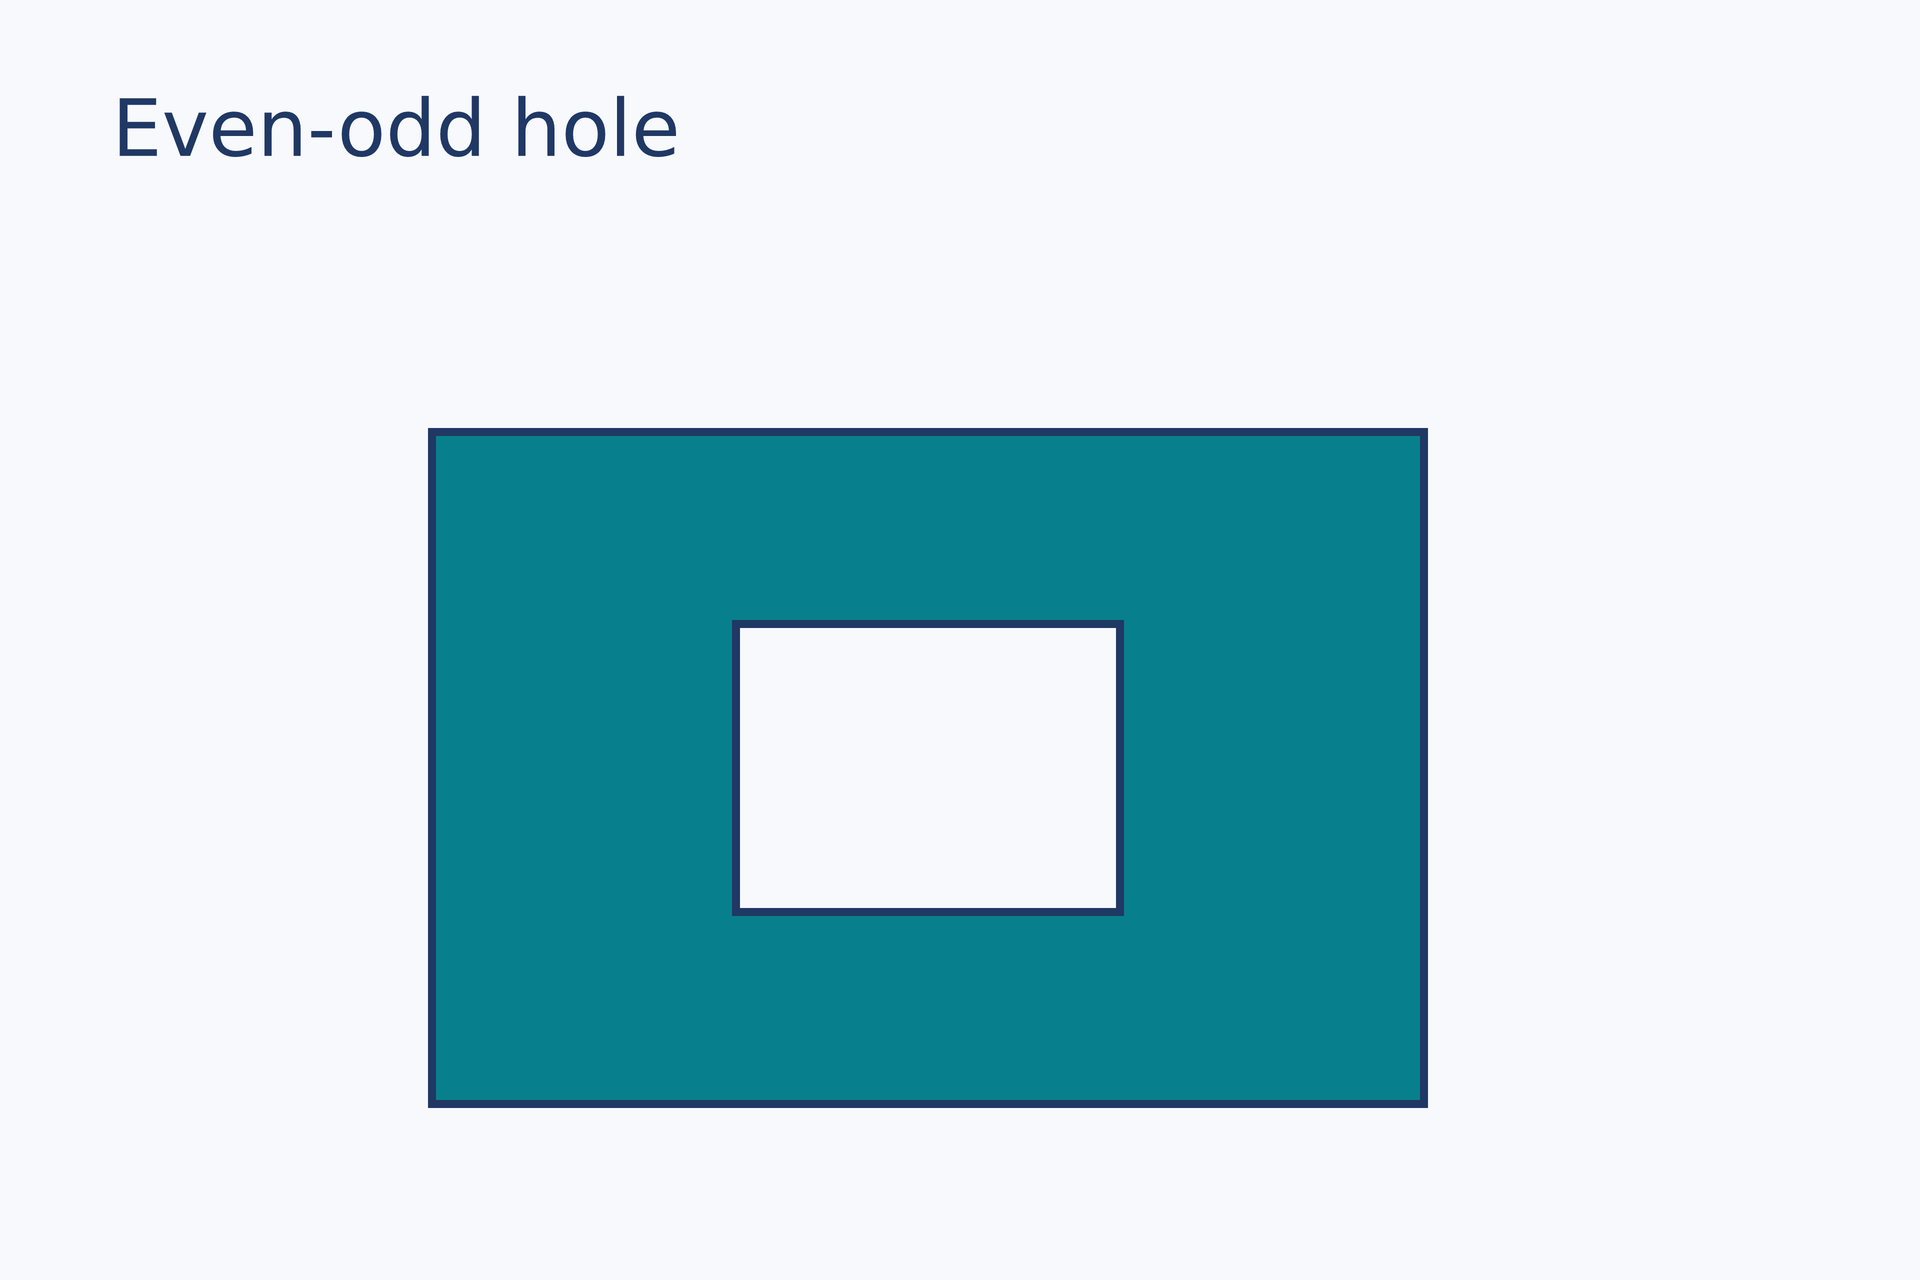
源码:evenodd-hole.lay。
复现命令:laymesh validate examples/gallery/shapes/evenodd-hole.lay;laymesh render examples/gallery/shapes/evenodd-hole.lay -o evenodd-hole.png --dpi 150。
实测:有效:examples/gallery/shapes/evenodd-hole.lay(120 × 80 mm,2 个顶层实例);PNG 709 × 472 px,150 DPI;警告:无。
线性渐变#
用多个色标沿对角线为矩形填充。
paint = linear_gradient(start=(0, 0), end=(1, 1), stops=[(0, "#f8cf7b"), (0.5, "#ed8770"), (1, "#8f5fa5")])page.add(rect(size=(75 mm, 42 mm), border_radius=5 mm, fill=paint), target=page.top_left, offset=(22 mm, 27 mm))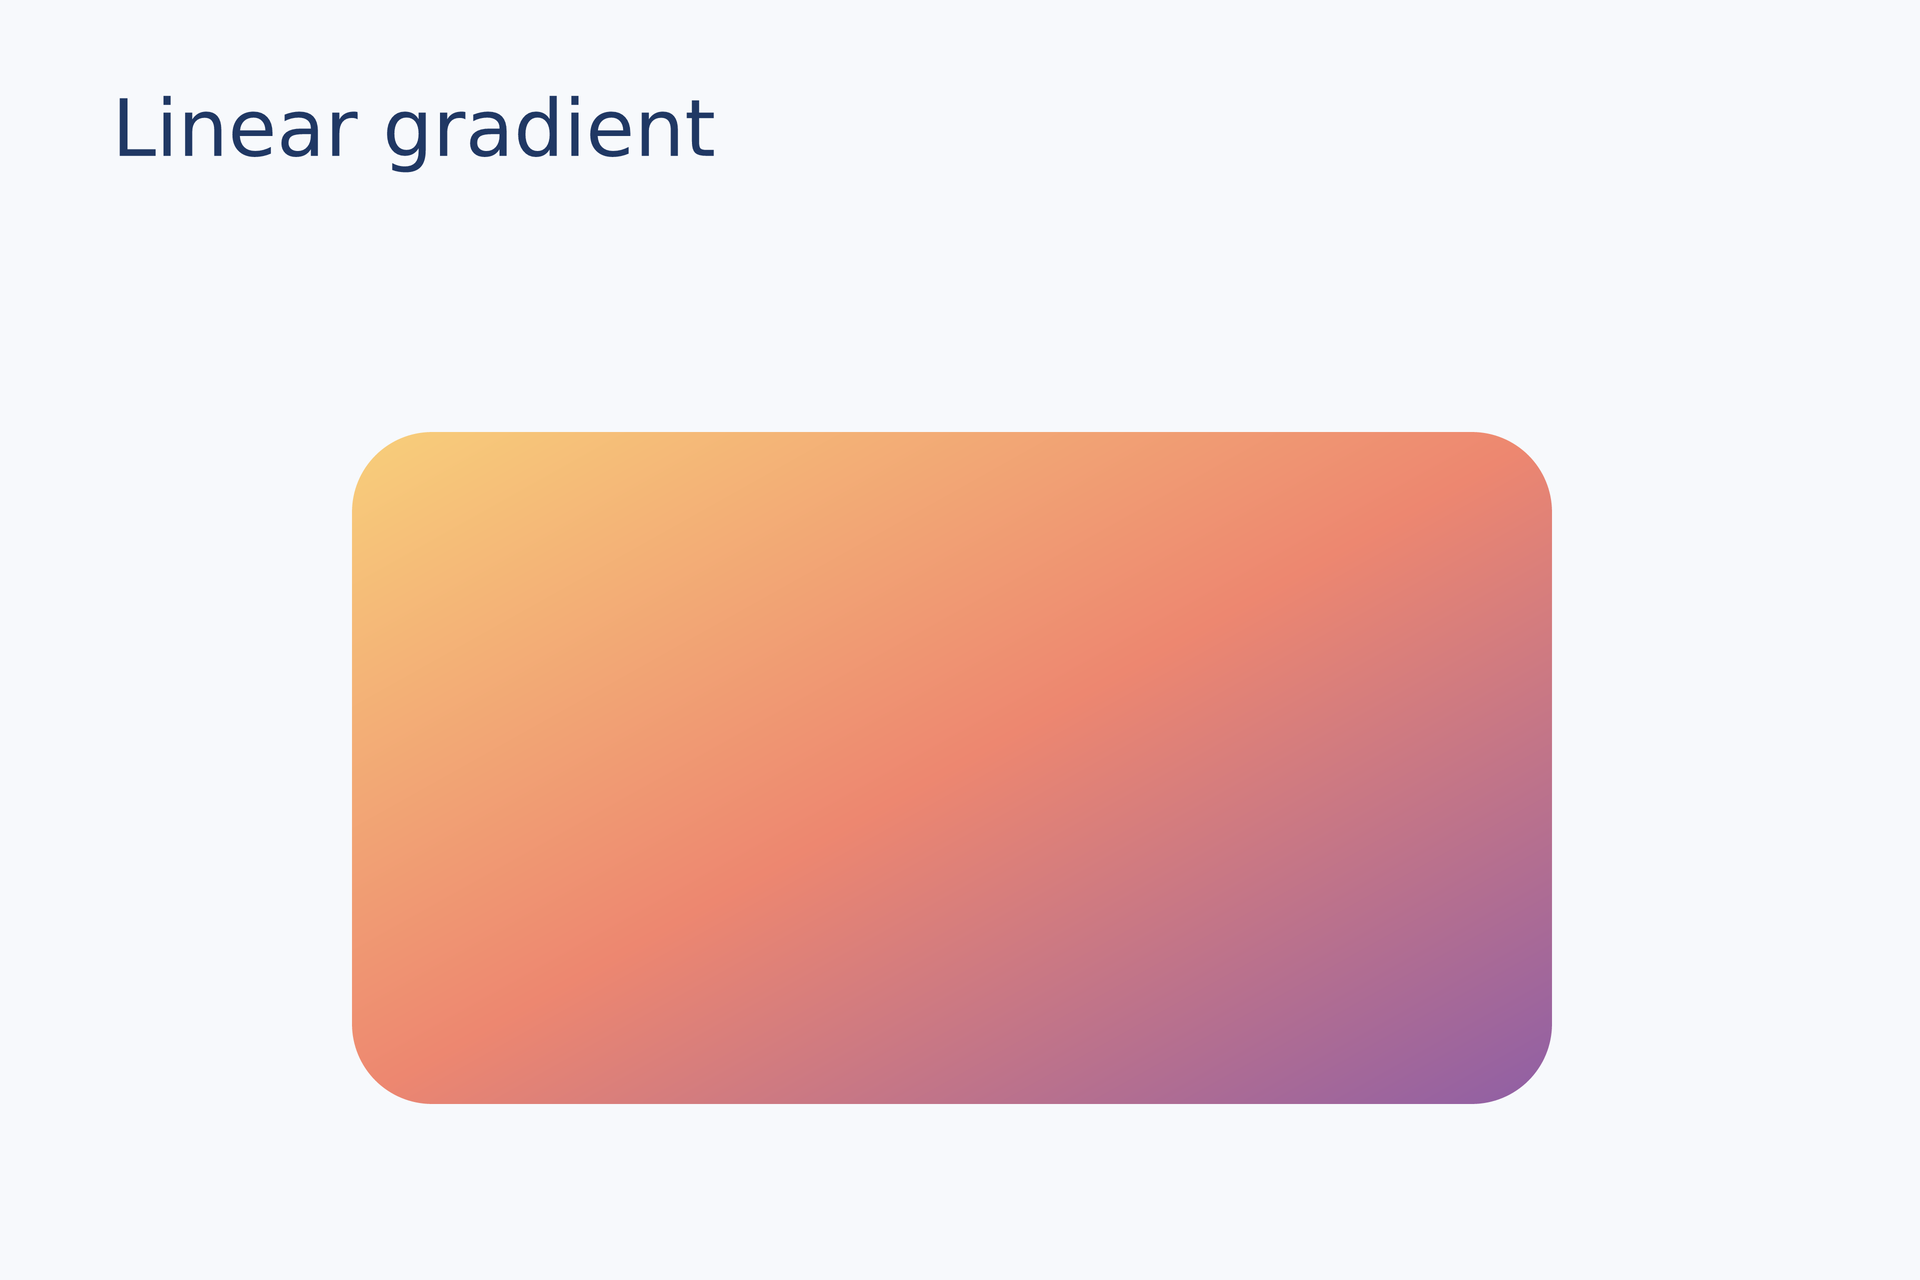
复现命令:laymesh validate examples/gallery/shapes/linear-gradient.lay;laymesh render examples/gallery/shapes/linear-gradient.lay -o linear-gradient.png --dpi 150。
实测:有效:examples/gallery/shapes/linear-gradient.lay(120 × 80 mm,2 个顶层实例);PNG 709 × 472 px,150 DPI;警告:无。
径向渐变#
用中心和半径控制椭圆内的径向色彩过渡。
paint = radial_gradient(center=(0.37, 0.3), radius=0.8, stops=[(0, "#d8fff7"), (1, "#087f8c")])page.add(ellipse(size=(54 mm, 43 mm), fill=paint), target=page.top_left, offset=(33 mm, 27 mm))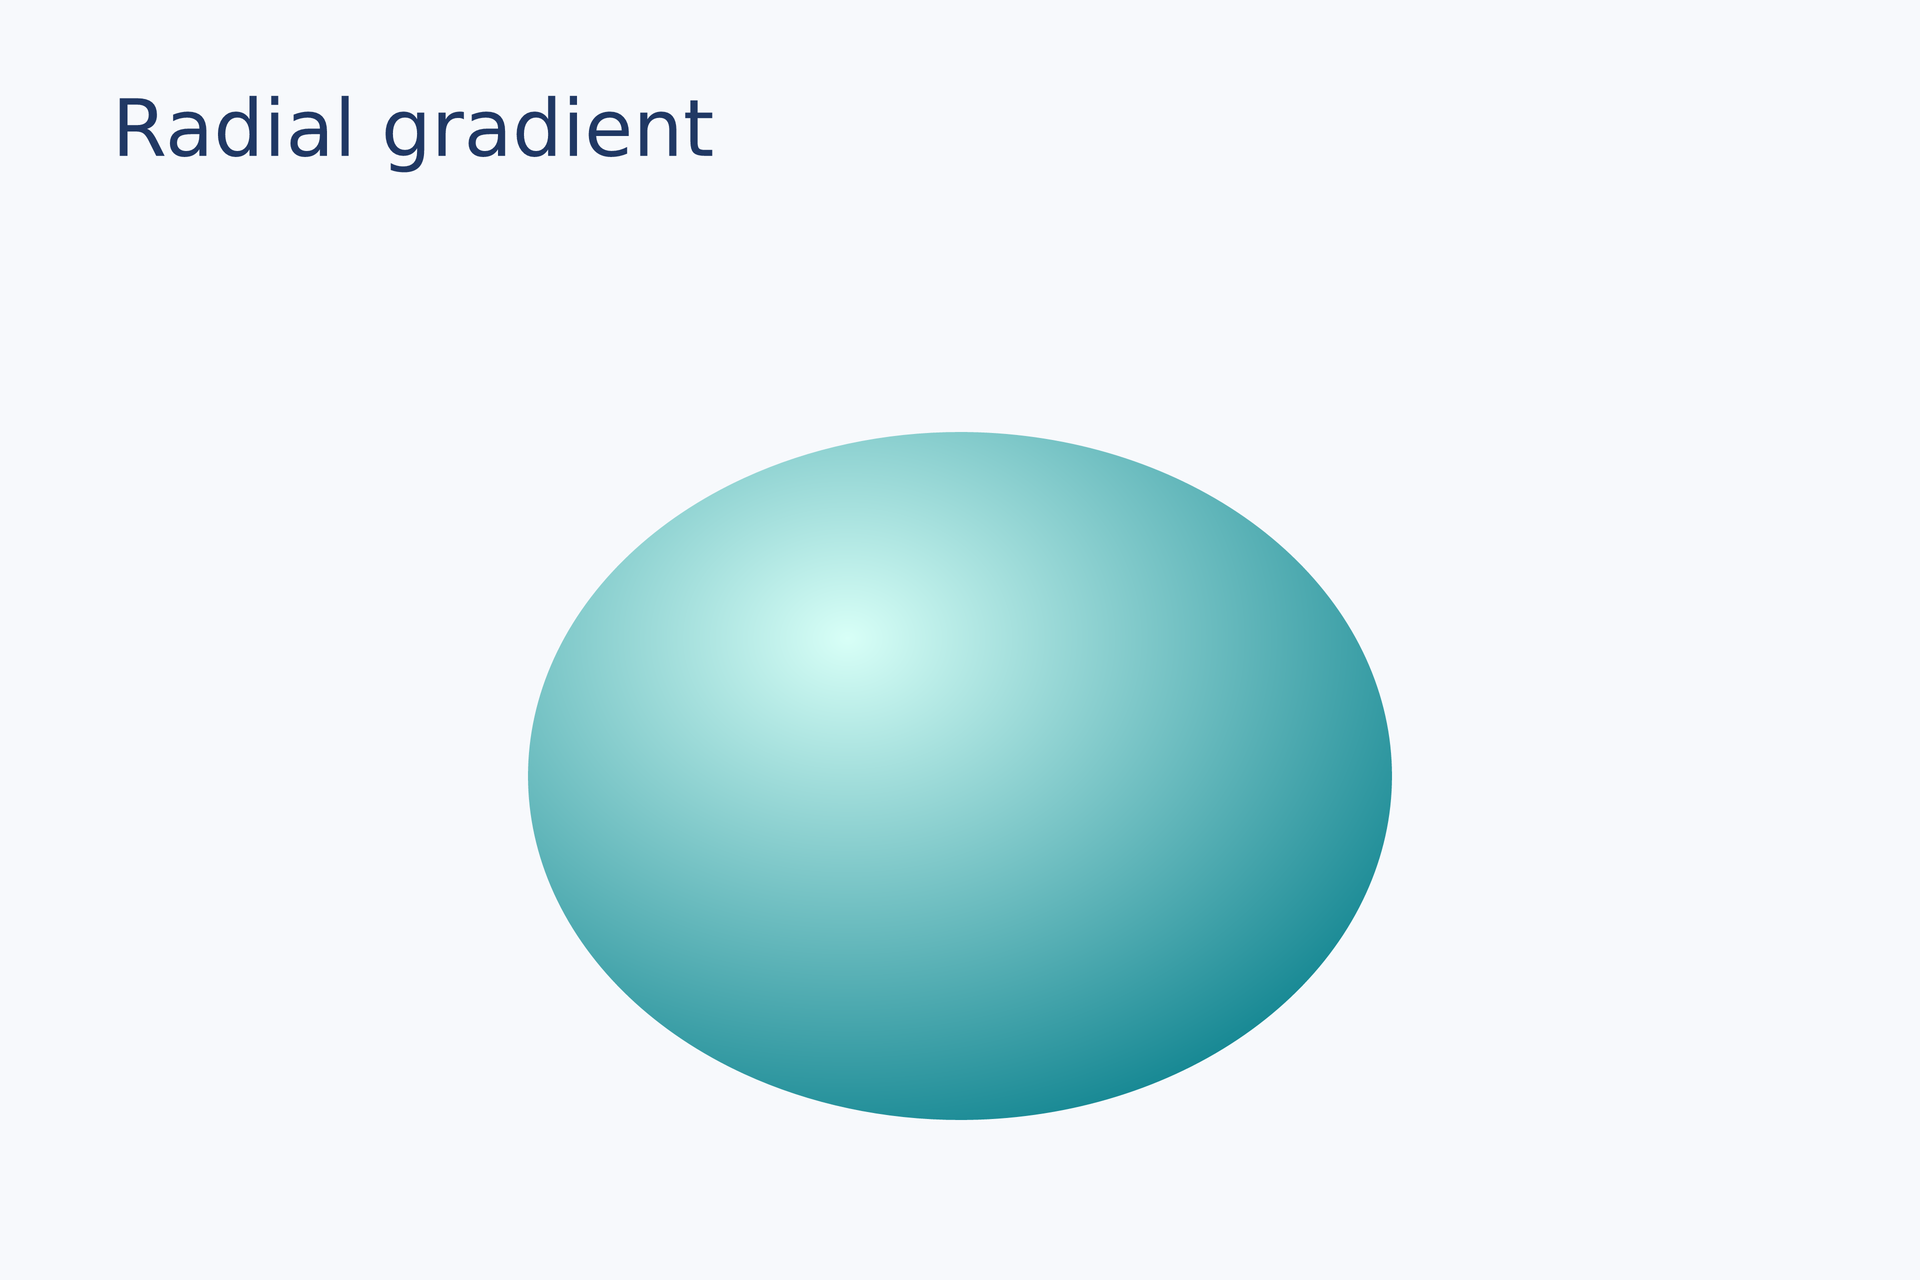
复现命令:laymesh validate examples/gallery/shapes/radial-gradient.lay;laymesh render examples/gallery/shapes/radial-gradient.lay -o radial-gradient.png --dpi 150。
实测:有效:examples/gallery/shapes/radial-gradient.lay(120 × 80 mm,2 个顶层实例);PNG 709 × 472 px,150 DPI;警告:无。
描边与组合#
自定义虚线#
两条线分别使用一组及多组绘制/间隔长度。
page.add(line(dx=84 mm, dy=0 mm, line_color="#087f8c", line_width=1.3 mm, line_dash=[5 mm, 2 mm], line_cap=round), target=page.top_left, offset=(16 mm, 35 mm))page.add(line(dx=84 mm, dy=0 mm, line_color="#e67563", line_width=1.3 mm, line_dash=[1 mm, 2 mm, 5 mm, 2 mm], line_cap=round), target=page.top_left, offset=(16 mm, 52 mm))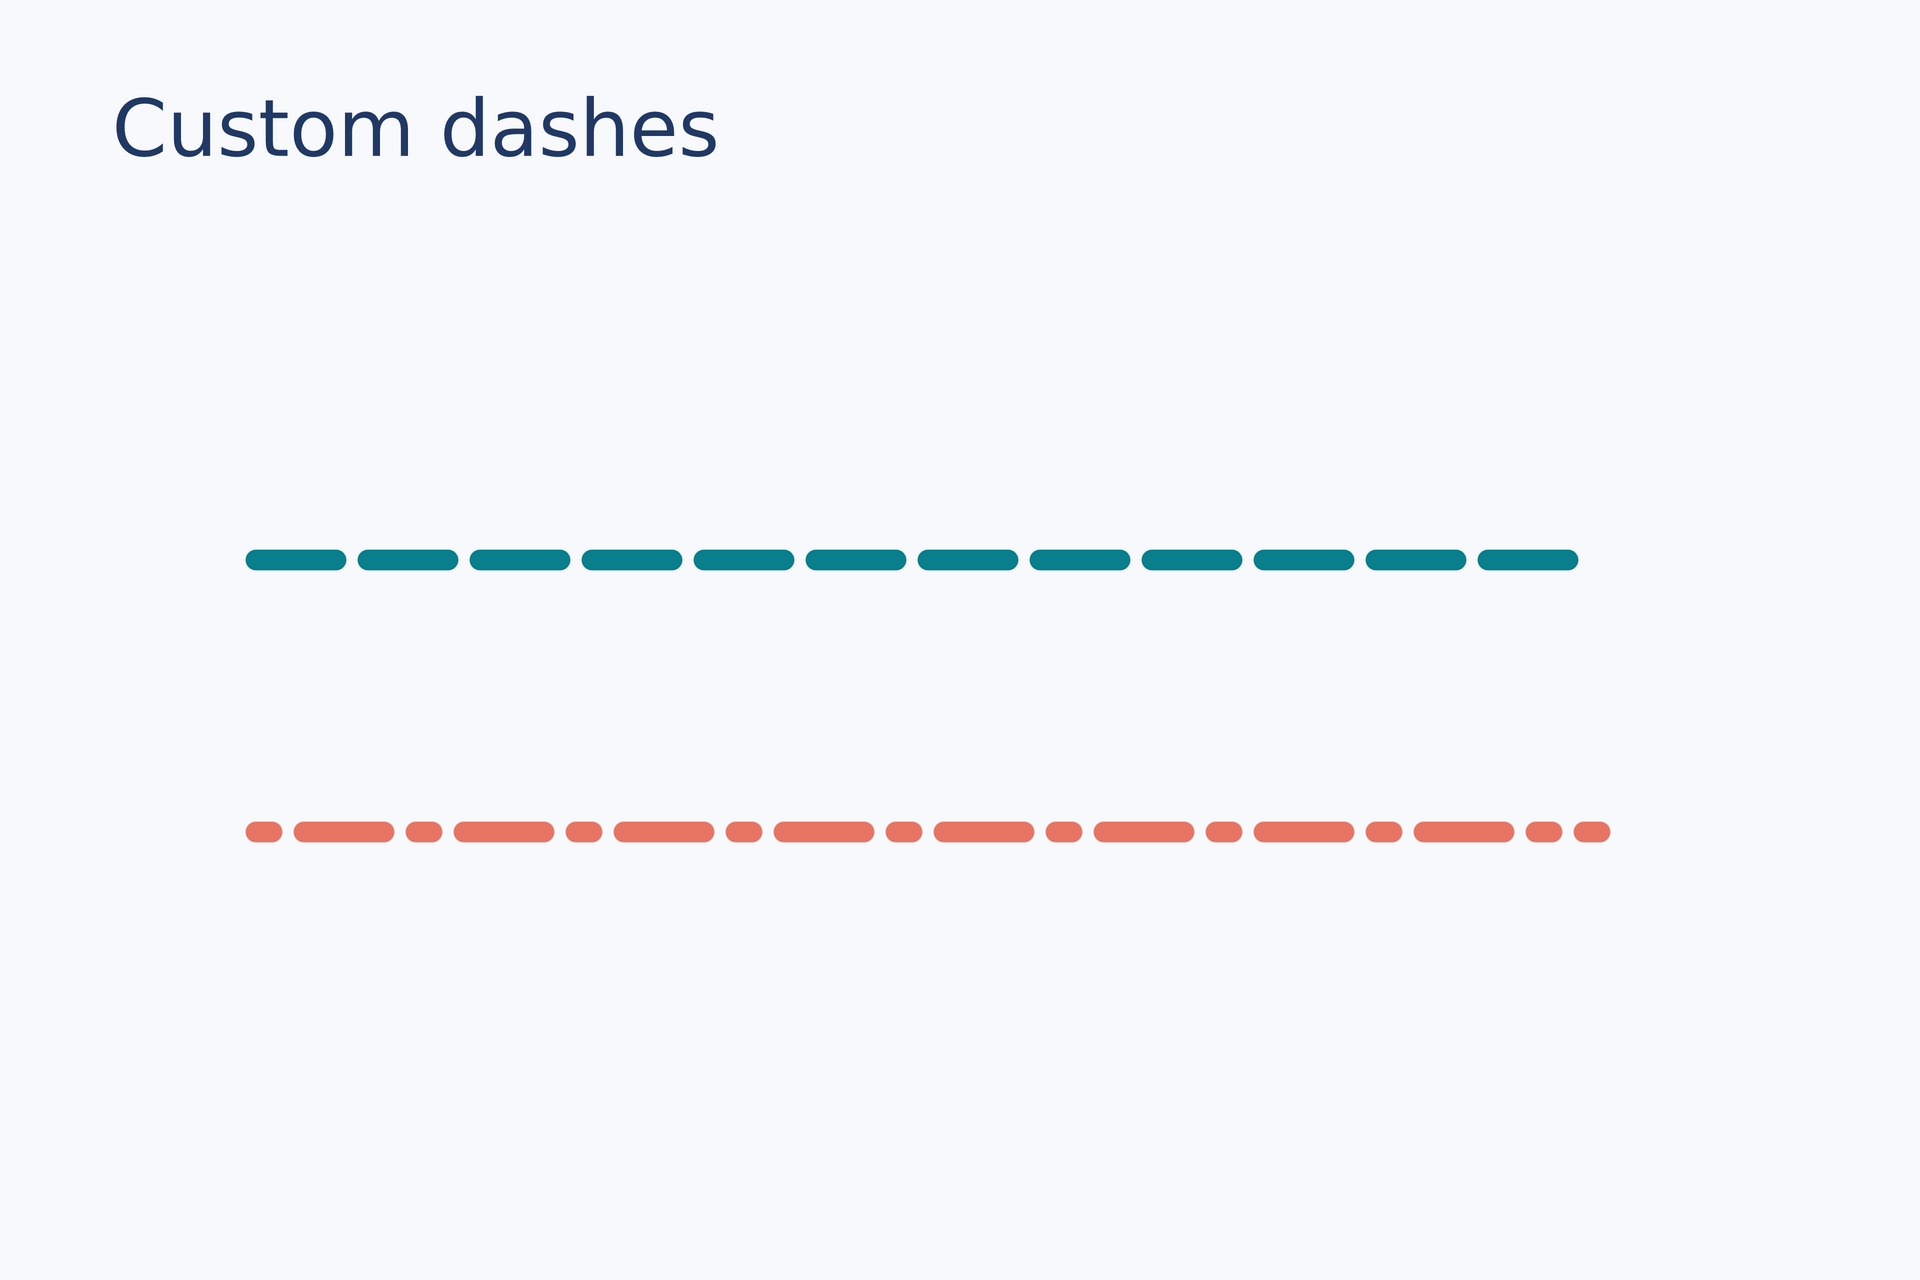
源码:dashes.lay。
复现命令:laymesh validate examples/gallery/shapes/dashes.lay;laymesh render examples/gallery/shapes/dashes.lay -o dashes.png --dpi 150。
实测:有效:examples/gallery/shapes/dashes.lay(120 × 80 mm,3 个顶层实例);PNG 709 × 472 px,150 DPI;警告:无。
可复用边框#
同一颜色和线宽生成单线、双线、三线轮廓。
box = rect(size=(27 mm, 25 mm), border_radius=3 mm, fill="#d8f0ec", border_color="#087f8c", border_width=1.6 mm, border_style="solid")page.add(box, target=page.top_left, offset=(11 mm, 32 mm))page.add(rect(size=(27 mm, 25 mm), border_radius=3 mm, fill="#d8f0ec", border_color="#087f8c", border_width=1.6 mm, border_style=double), target=page.top_left, offset=(46 mm, 32 mm))page.add(rect(size=(27 mm, 25 mm), border_radius=3 mm, fill="#d8f0ec", border_color="#087f8c", border_width=1.6 mm, border_style=triple), target=page.top_left, offset=(81 mm, 32 mm))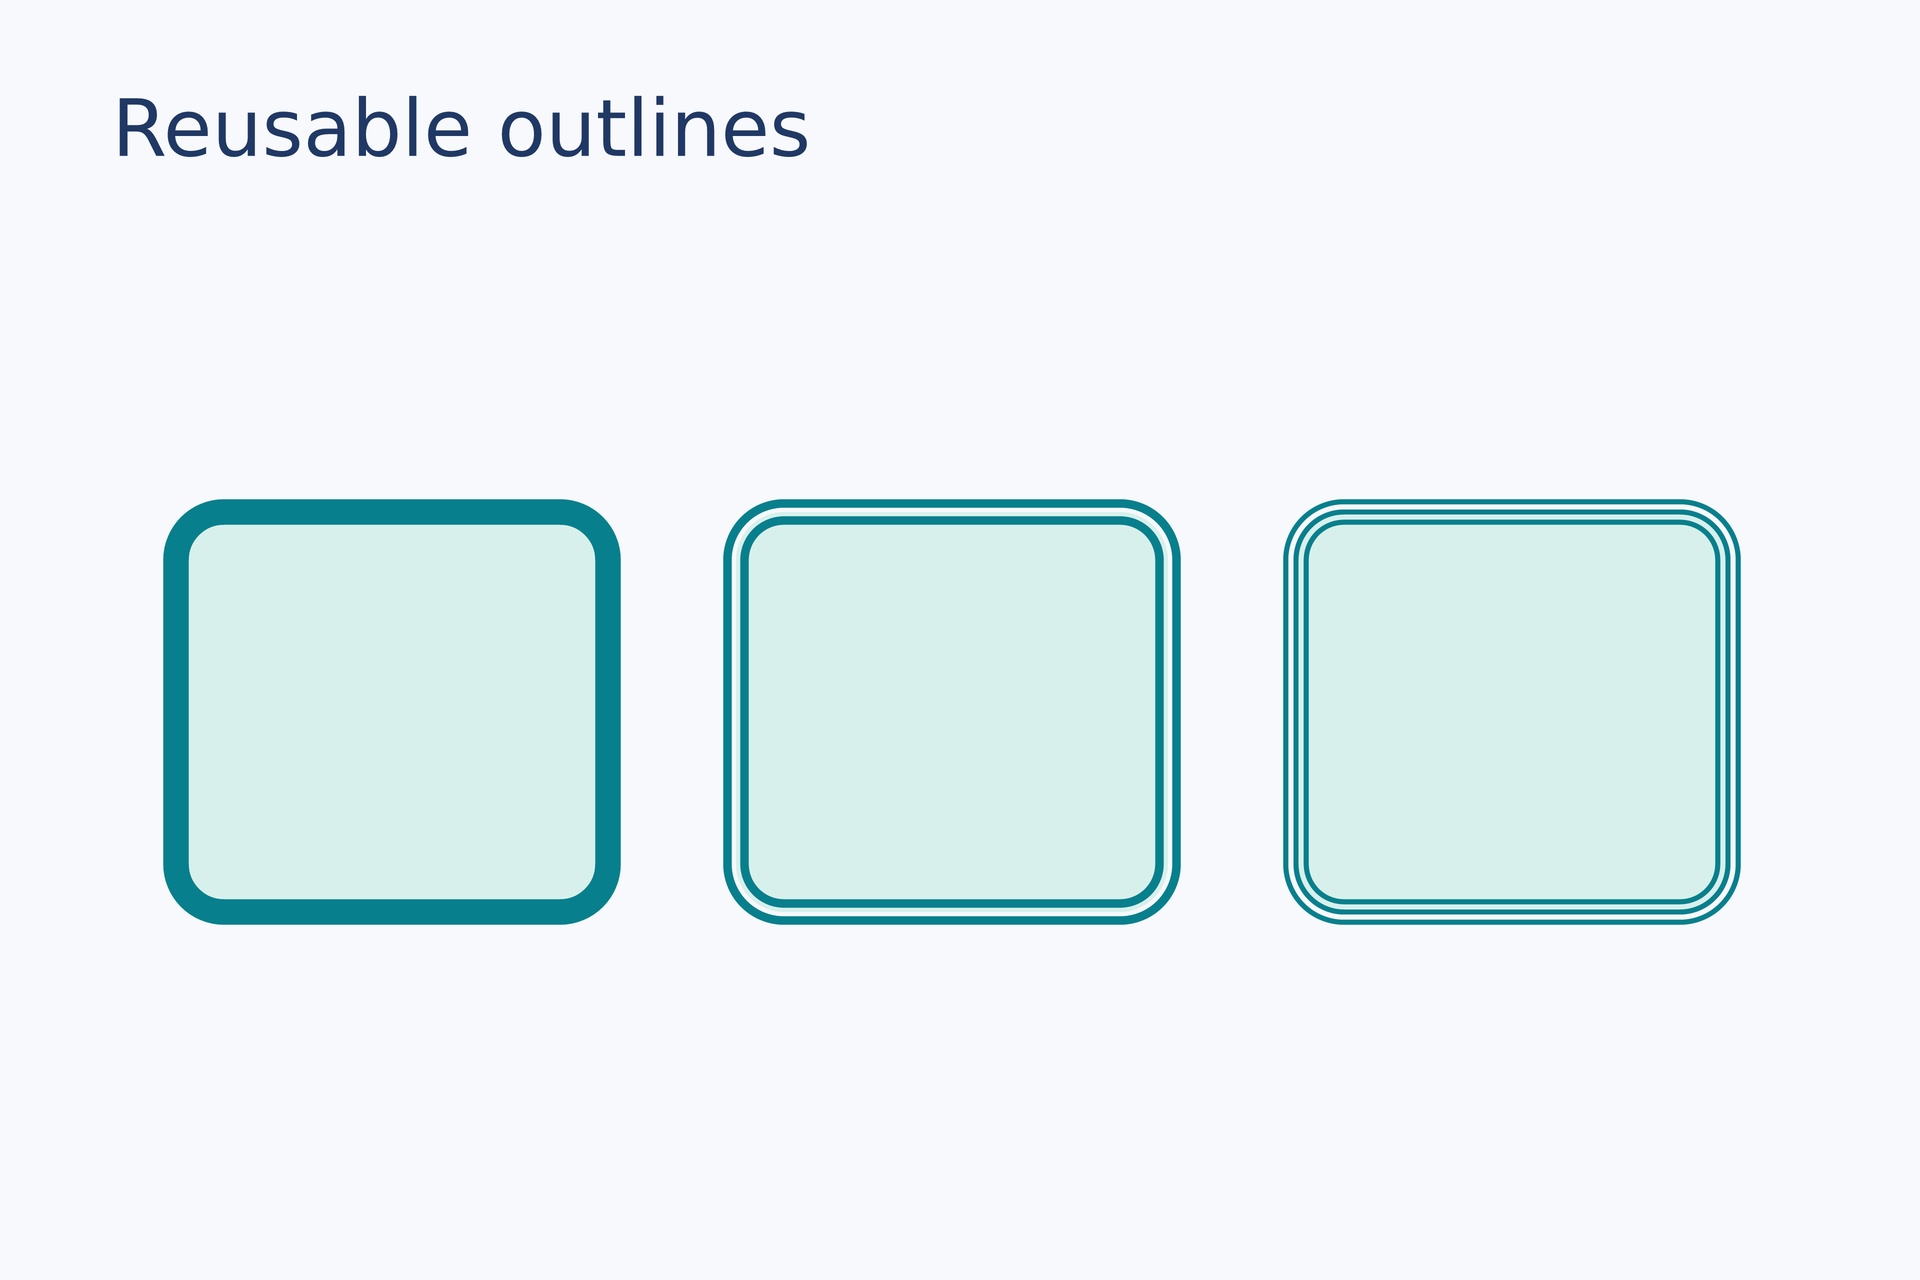
源码:outlines.lay。
复现命令:laymesh validate examples/gallery/shapes/outlines.lay;laymesh render examples/gallery/shapes/outlines.lay -o outlines.png --dpi 150。
实测:有效:examples/gallery/shapes/outlines.lay(120 × 80 mm,4 个顶层实例);PNG 709 × 472 px,150 DPI;警告:无。
实例轮廓融合#
连接矩形和线条的可见轮廓,生成一个新的矢量路径。
box = rect(size=(23 mm, 21 mm), fill="#087f8c")left = page.add(box, target=page.top_left, offset=(16 mm, 35 mm))stem = page.add(line(dx=42 mm, dy=0 mm, line_color="#087f8c", line_width=4 mm), target=page.top_left, offset=(45 mm, 45.5 mm))joined = page.fuse(left, stem, points=(left.middle_right, stem.start), bridge_width=4 mm, junction=round, radius=2 mm, fill="#087f8c", border_color="none")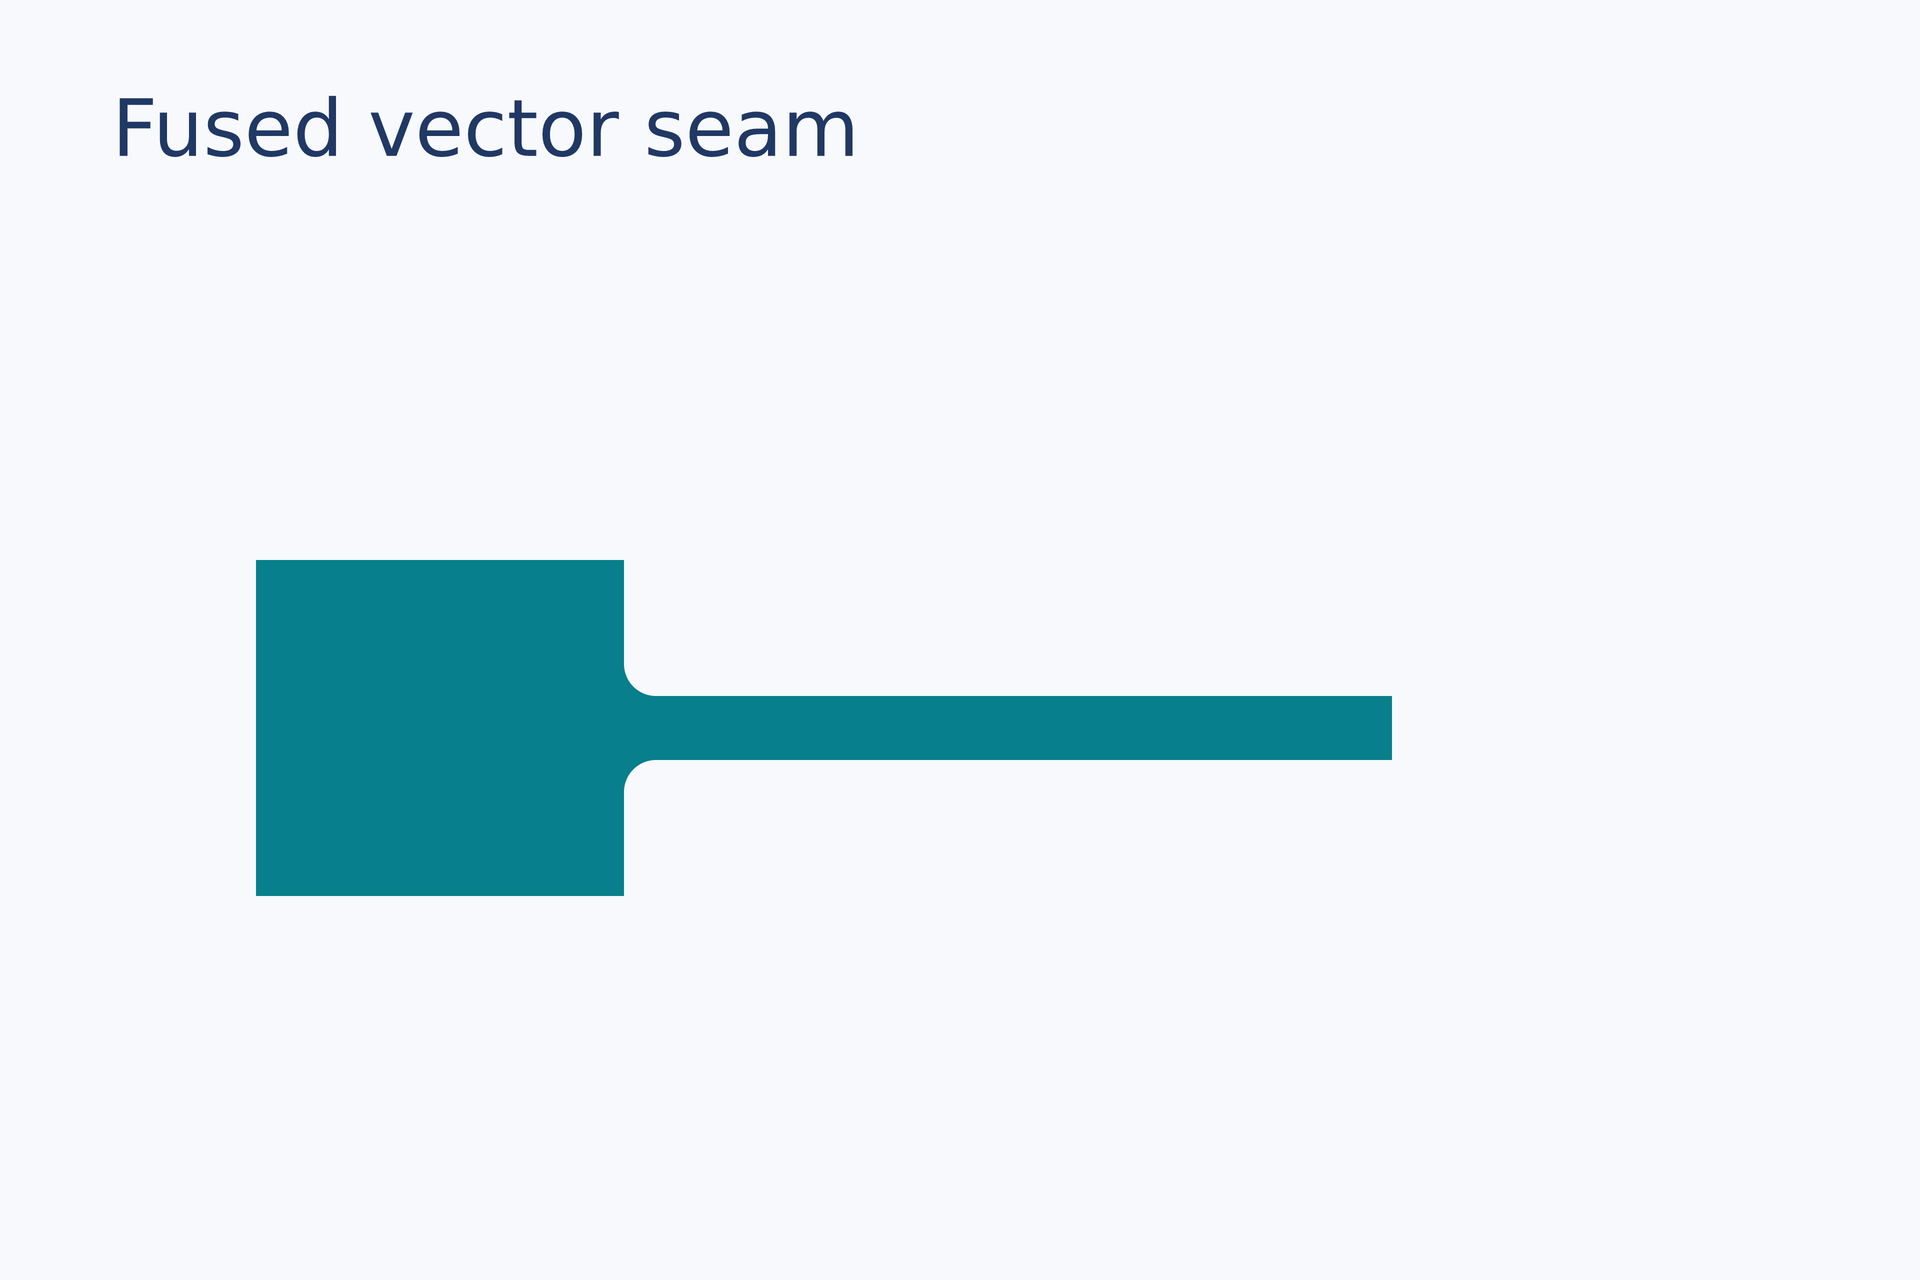
源码:fuse.lay。
复现命令:laymesh validate examples/gallery/shapes/fuse.lay;laymesh render examples/gallery/shapes/fuse.lay -o fuse.png --dpi 150。
实测:有效:examples/gallery/shapes/fuse.lay(120 × 80 mm,2 个顶层实例);PNG 709 × 472 px,150 DPI;警告:无。
斜线接入平面边界#
向上和向下倾斜的线条分别接入矩形边界,检查两侧圆角与连接段连续。
box = rect(size=(20 mm, 18 mm), fill="#087f8c")upper = page.add(box, target=page.top_left, offset=(12 mm, 24 mm))up_line = page.add(line(dx=35 mm, dy=-12 mm, line_width=3 mm), target=page.top_left, offset=(44 mm, 21 mm))up_join = page.fuse(upper, up_line, points=(upper.middle_right, up_line.start), bridge_width=3 mm, junction=round, radius=2 mm, fill="#087f8c", border_color="none") lower = page.add(box, target=page.top_left, offset=(12 mm, 50 mm))down_line = page.add(line(dx=35 mm, dy=12 mm, line_width=3 mm), target=page.top_left, offset=(44 mm, 59 mm))down_join = page.fuse(lower, down_line, points=(lower.middle_right, down_line.start), bridge_width=3 mm, junction=round, radius=2 mm, fill="#087f8c", border_color="none")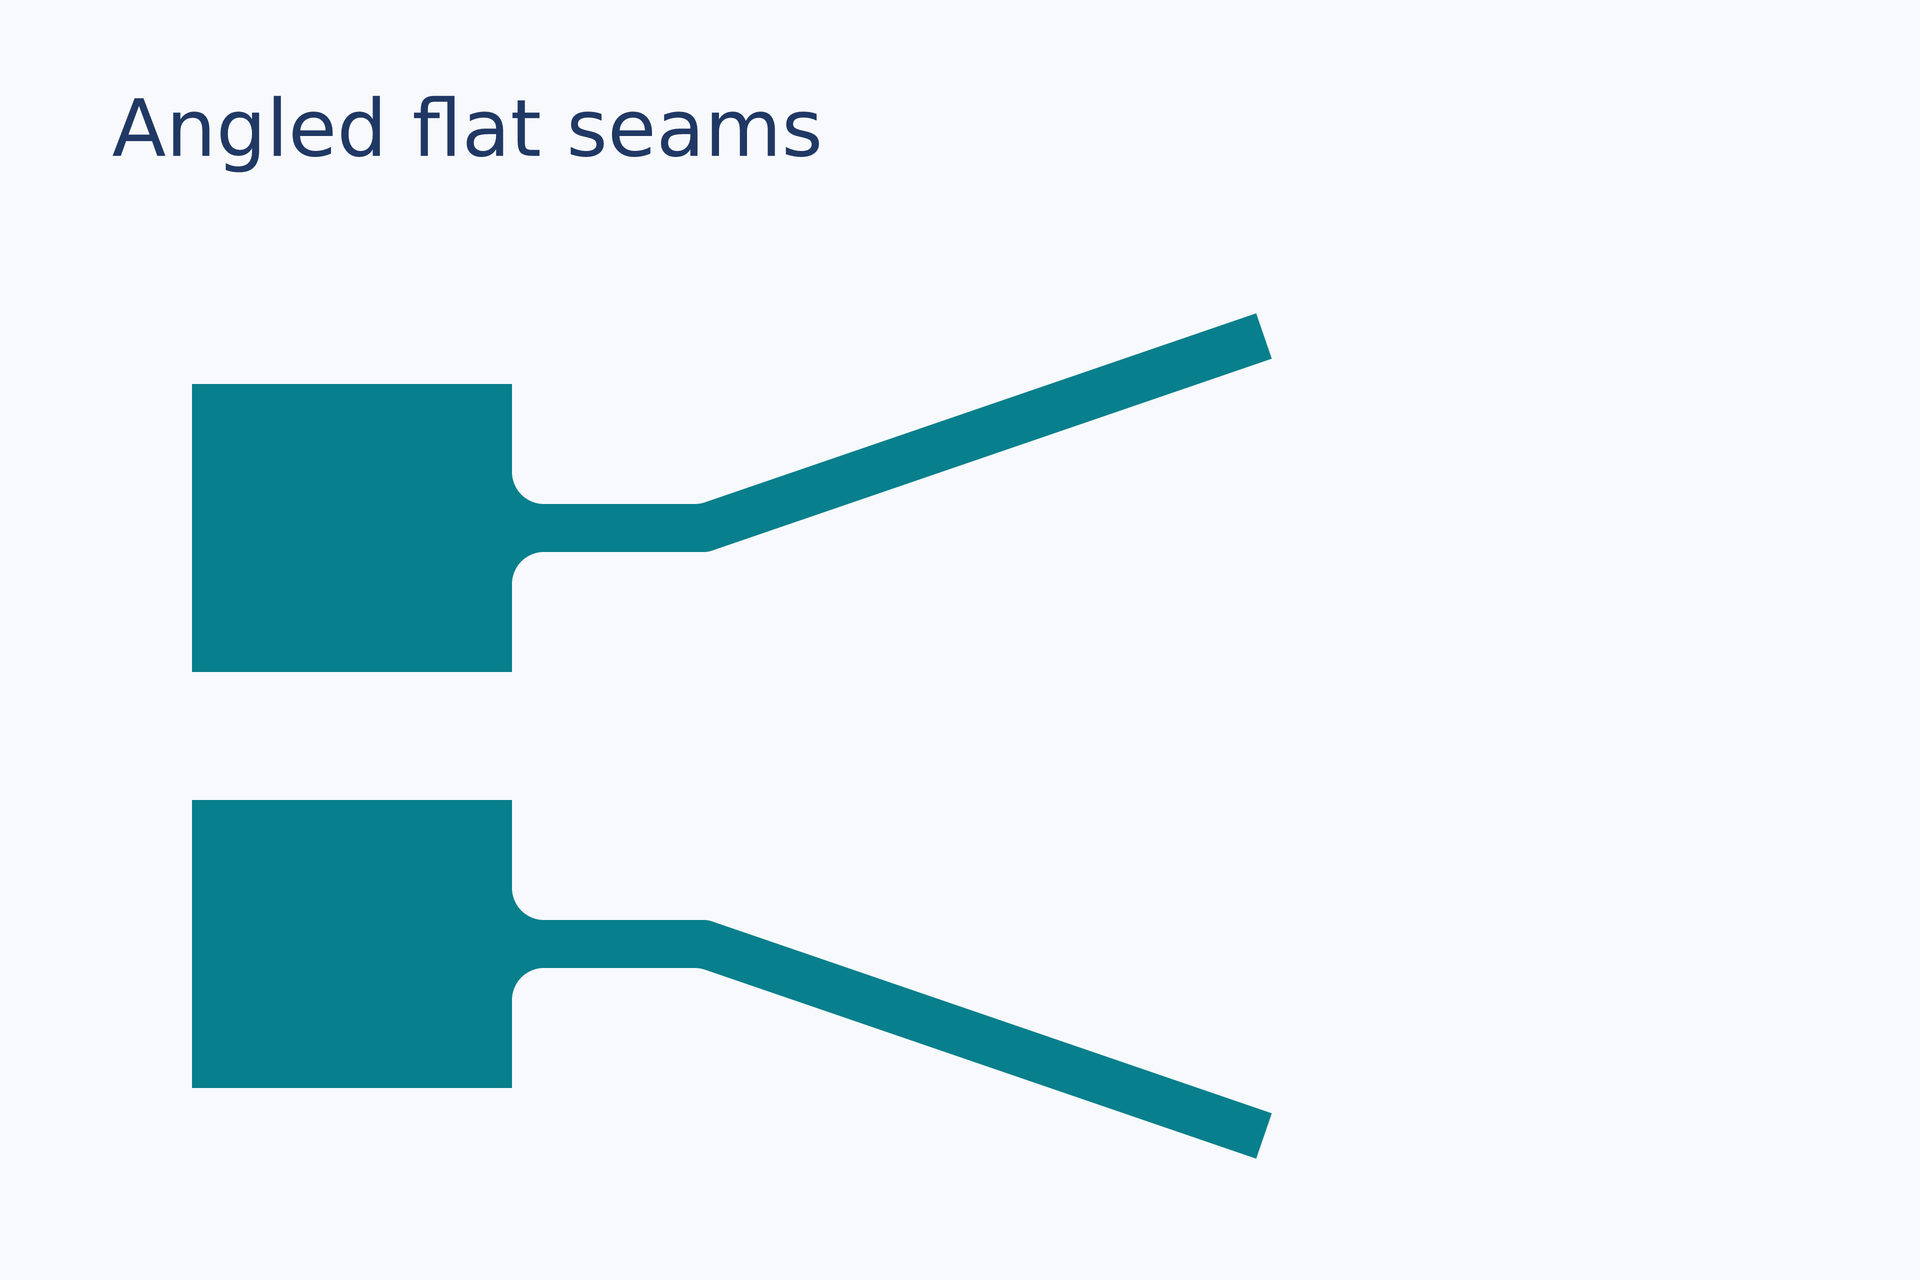
源码:fuse-angled.lay。
复现命令:laymesh validate examples/gallery/shapes/fuse-angled.lay;laymesh render examples/gallery/shapes/fuse-angled.lay -o fuse-angled.png --dpi 150。
实测:有效:examples/gallery/shapes/fuse-angled.lay(120 × 80 mm,3 个顶层实例);PNG 709 × 472 px,150 DPI;警告:无。
斜线接入曲线边界#
斜线分别接入椭圆和自由贝塞尔曲线,检查曲线处的圆角接缝。
disk = ellipse(size=(22 mm, 22 mm), fill="#087f8c")round_surface = page.add(disk, target=page.top_left, offset=(12 mm, 24 mm))up_line = page.add(line(dx=30 mm, dy=-8 mm, line_width=3 mm), target=page.top_left, offset=(46 mm, 27 mm))round_join = page.fuse(round_surface, up_line, points=(round_surface.middle_right, up_line.start), bridge_width=3 mm, junction=round, radius=2 mm, fill="#087f8c", border_color="none") freeform = path(commands=[move_to(0 mm,0 mm), line_to(20 mm,0 mm), cubic_to(25 mm,4 mm,25 mm,16 mm,20 mm,20 mm), line_to(0 mm,20 mm), close()], fill="#087f8c")curved_surface = page.add(freeform, target=page.top_left, offset=(12 mm, 51 mm))down_line = page.add(line(dx=30 mm, dy=8 mm, line_width=3 mm), target=page.top_left, offset=(46 mm, 61 mm))curved_join = page.fuse(curved_surface, down_line, points=(curved_surface.middle_right, down_line.start), bridge_width=3 mm, junction=round, radius=2 mm, fill="#087f8c", border_color="none")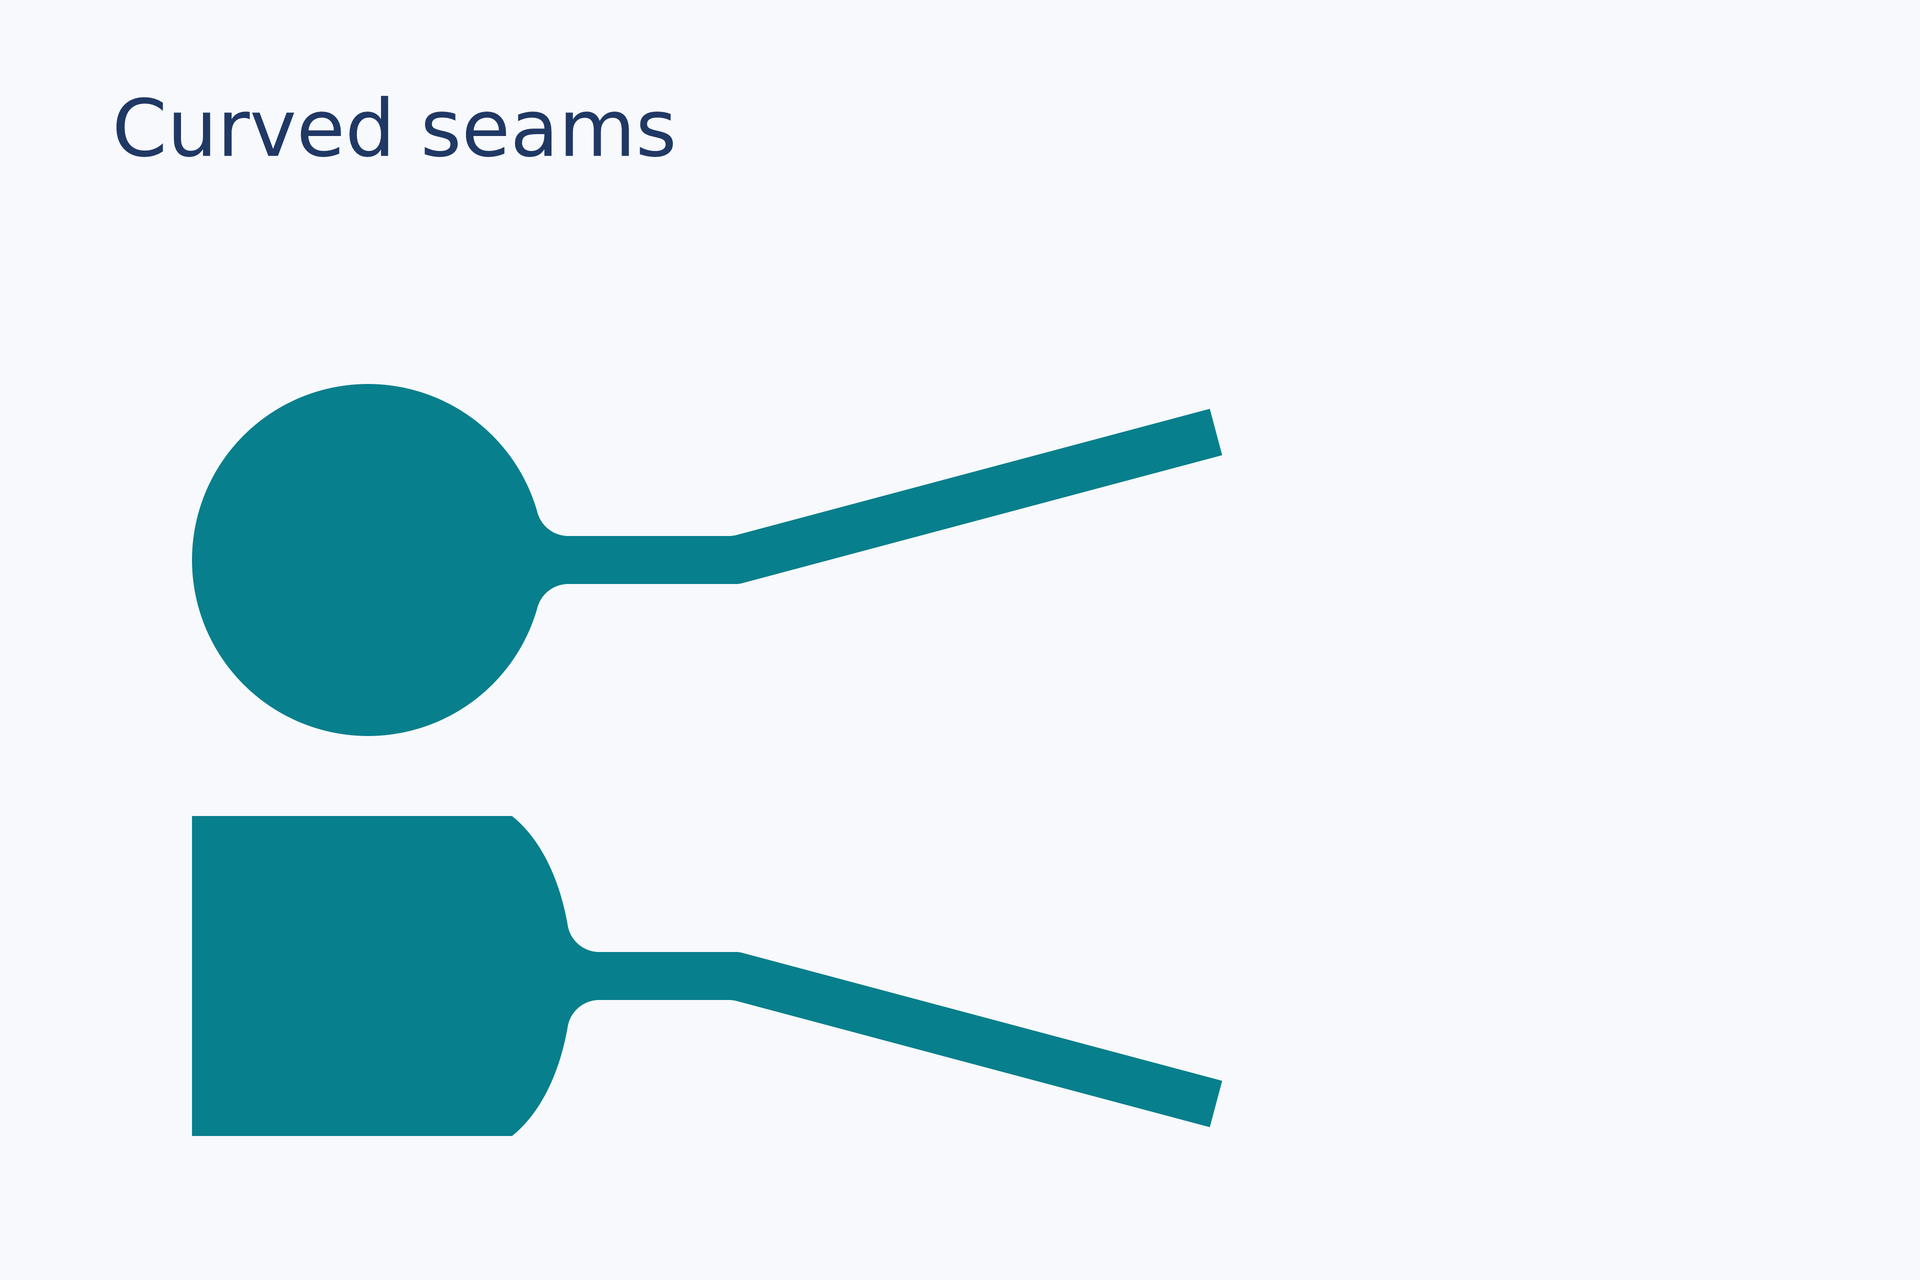
源码:fuse-curved.lay。
复现命令:laymesh validate examples/gallery/shapes/fuse-curved.lay;laymesh render examples/gallery/shapes/fuse-curved.lay -o fuse-curved.png --dpi 150。
实测:有效:examples/gallery/shapes/fuse-curved.lay(120 × 80 mm,3 个顶层实例);PNG 709 × 472 px,150 DPI;警告:无。
空心矩形右边接斜线#
空心矩形的右边中点接入斜线,保持矩形内孔和圆角接点。
frame = rect(size=(46 mm, 42 mm), fill="none", border_color="#ffffff", border_width=2 mm)box = page.add(frame, target=page.top_left, offset=(16 mm, 26 mm))stem = page.add(line(dx=32 mm, dy=-32 mm, line_color="#ffffff", line_width=2 mm, line_cap=round), target=page.top_left, offset=(62 mm, 15 mm))joined = page.fuse(box, stem, points=(box.middle_right, stem.start), junction=round, radius=1.5 mm, fill="#ffffff", border_color="none")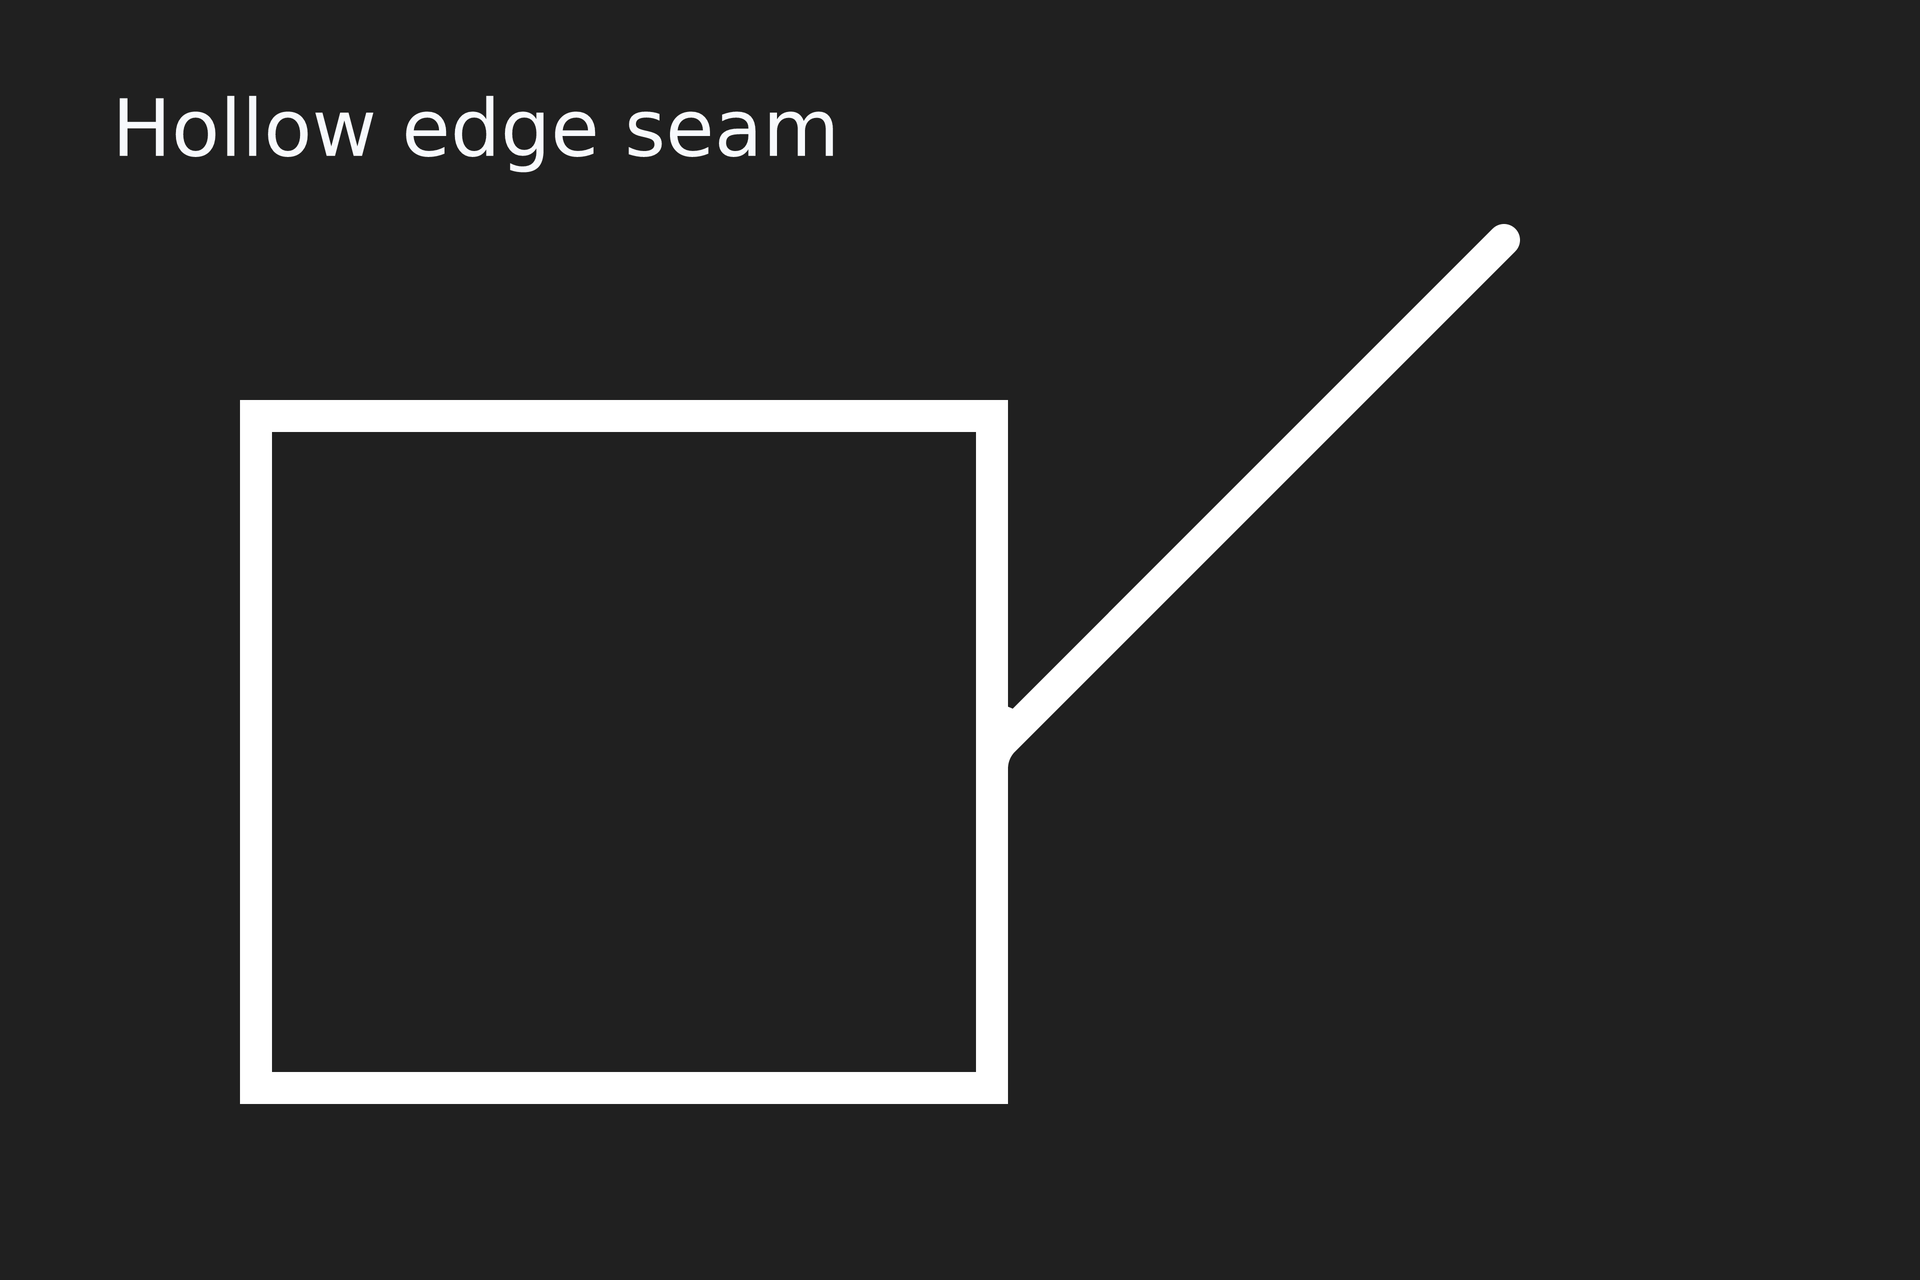
复现命令:laymesh validate examples/gallery/shapes/fuse-outline-edge.lay;laymesh render examples/gallery/shapes/fuse-outline-edge.lay -o fuse-outline-edge.png --dpi 150。
实测:有效:examples/gallery/shapes/fuse-outline-edge.lay(120 × 80 mm,2 个顶层实例);PNG 709 × 472 px,150 DPI;警告:无。
空心矩形右上角接斜线#
空心矩形的右上角接入斜线,检查外轮廓与内孔连续。
frame = rect(size=(46 mm, 38 mm), fill="none", border_color="#ffffff", border_width=2 mm)box = page.add(frame, target=page.top_left, offset=(16 mm, 34 mm))stem = page.add(line(dx=28 mm, dy=-28 mm, line_color="#ffffff", line_width=2 mm, line_cap=round), target=page.top_left, offset=(62 mm, 6 mm))joined = page.fuse(box, stem, points=(box.top_right, stem.start), junction=round, radius=1.5 mm, fill="#ffffff", border_color="none")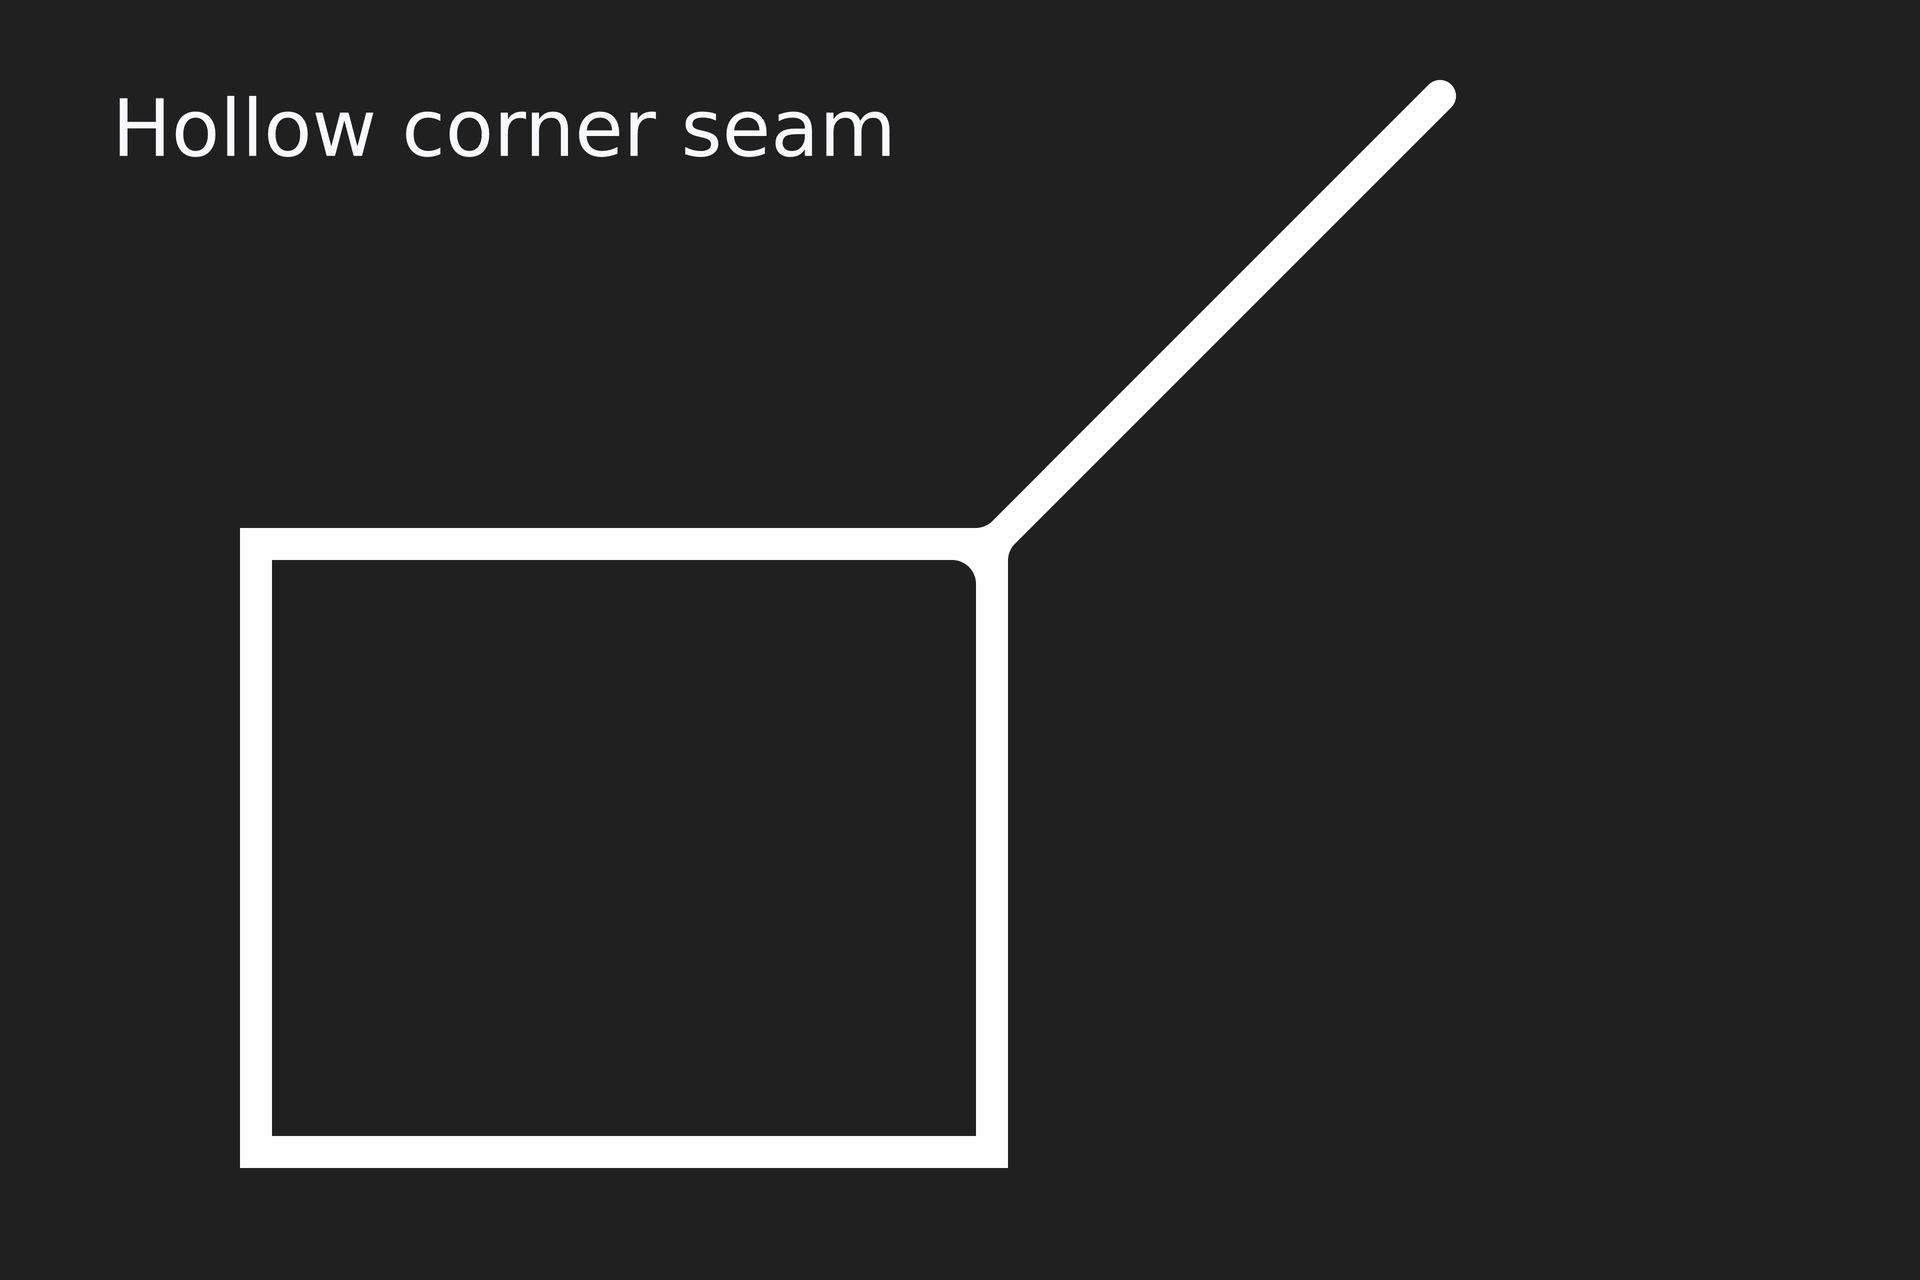
复现命令:laymesh validate examples/gallery/shapes/fuse-outline-corner.lay;laymesh render examples/gallery/shapes/fuse-outline-corner.lay -o fuse-outline-corner.png --dpi 150。
实测:有效:examples/gallery/shapes/fuse-outline-corner.lay(120 × 80 mm,2 个顶层实例);PNG 709 × 472 px,150 DPI;警告:无。
线条端点与独立头部#
# Gallery: shapes / line-endpointspage=canvas(name="Line endpoints",size=(180mm,120mm),background="#fff")page.add(text("Line endpoints",font_family="DejaVu Sans",font_size=16pt,color="#203864"),offset=(8mm,6mm))# BEGIN DEMOshapes=["triangle","open","stealth","dot","diamond","bar"]for item in [(36mm,"Start"),(77mm,"End"),(118mm,"Both"),(153mm,"Head only")] { page.add(text(item[1],font_family="DejaVu Sans",font_size=8pt,color="#425466"),offset=(item[0],18mm))}for i in range(6) { y=30mm+i*11mm page.add(text(shapes[i],font_family="DejaVu Sans",font_size=8pt,color="#425466"),offset=(8mm,y-2mm)) h=head(shape=shapes[i],size=(6mm,5mm)) page.add(line(length=27mm,line_width=1.6mm,line_color="#0072b299",start_head=h,end_cap="round"),offset=(35mm,y)) page.add(line(length=27mm,line_width=1.6mm,line_color="#0072b299",start_cap="round",end_head=h),offset=(76mm,y)) page.add(line(length=27mm,line_width=1.6mm,line_color="#0072b299",start_head=h,end_head=h),offset=(117mm,y)) page.add(line(length=0mm,angle=-25deg,line_color="#087f8c",end_head=h),anchor=self.path.end,offset=(162mm,y))}route=page.add(path(commands=[move_to(0mm,8mm),cubic_to(c1x=12mm,c1y=-4mm,c2x=32mm,c2y=20mm,x=47mm,y=8mm)],border_color="#e67563",border_width=1.5mm,start_head=head(size=(6mm,5mm)),end_head=head(size=(6mm,5mm))),offset=(35mm,95mm))for p in [route.path.start,route.path.end] { page.add(ellipse(size=(1mm,1mm),fill="#203864"),anchor=center,target=p)}# END DEMOpage.add(text("Dots mark logical endpoints; centerline reaches each arrow tip.",font_family="DejaVu Sans",font_size=8pt,color="#425466"),offset=(35mm,111mm))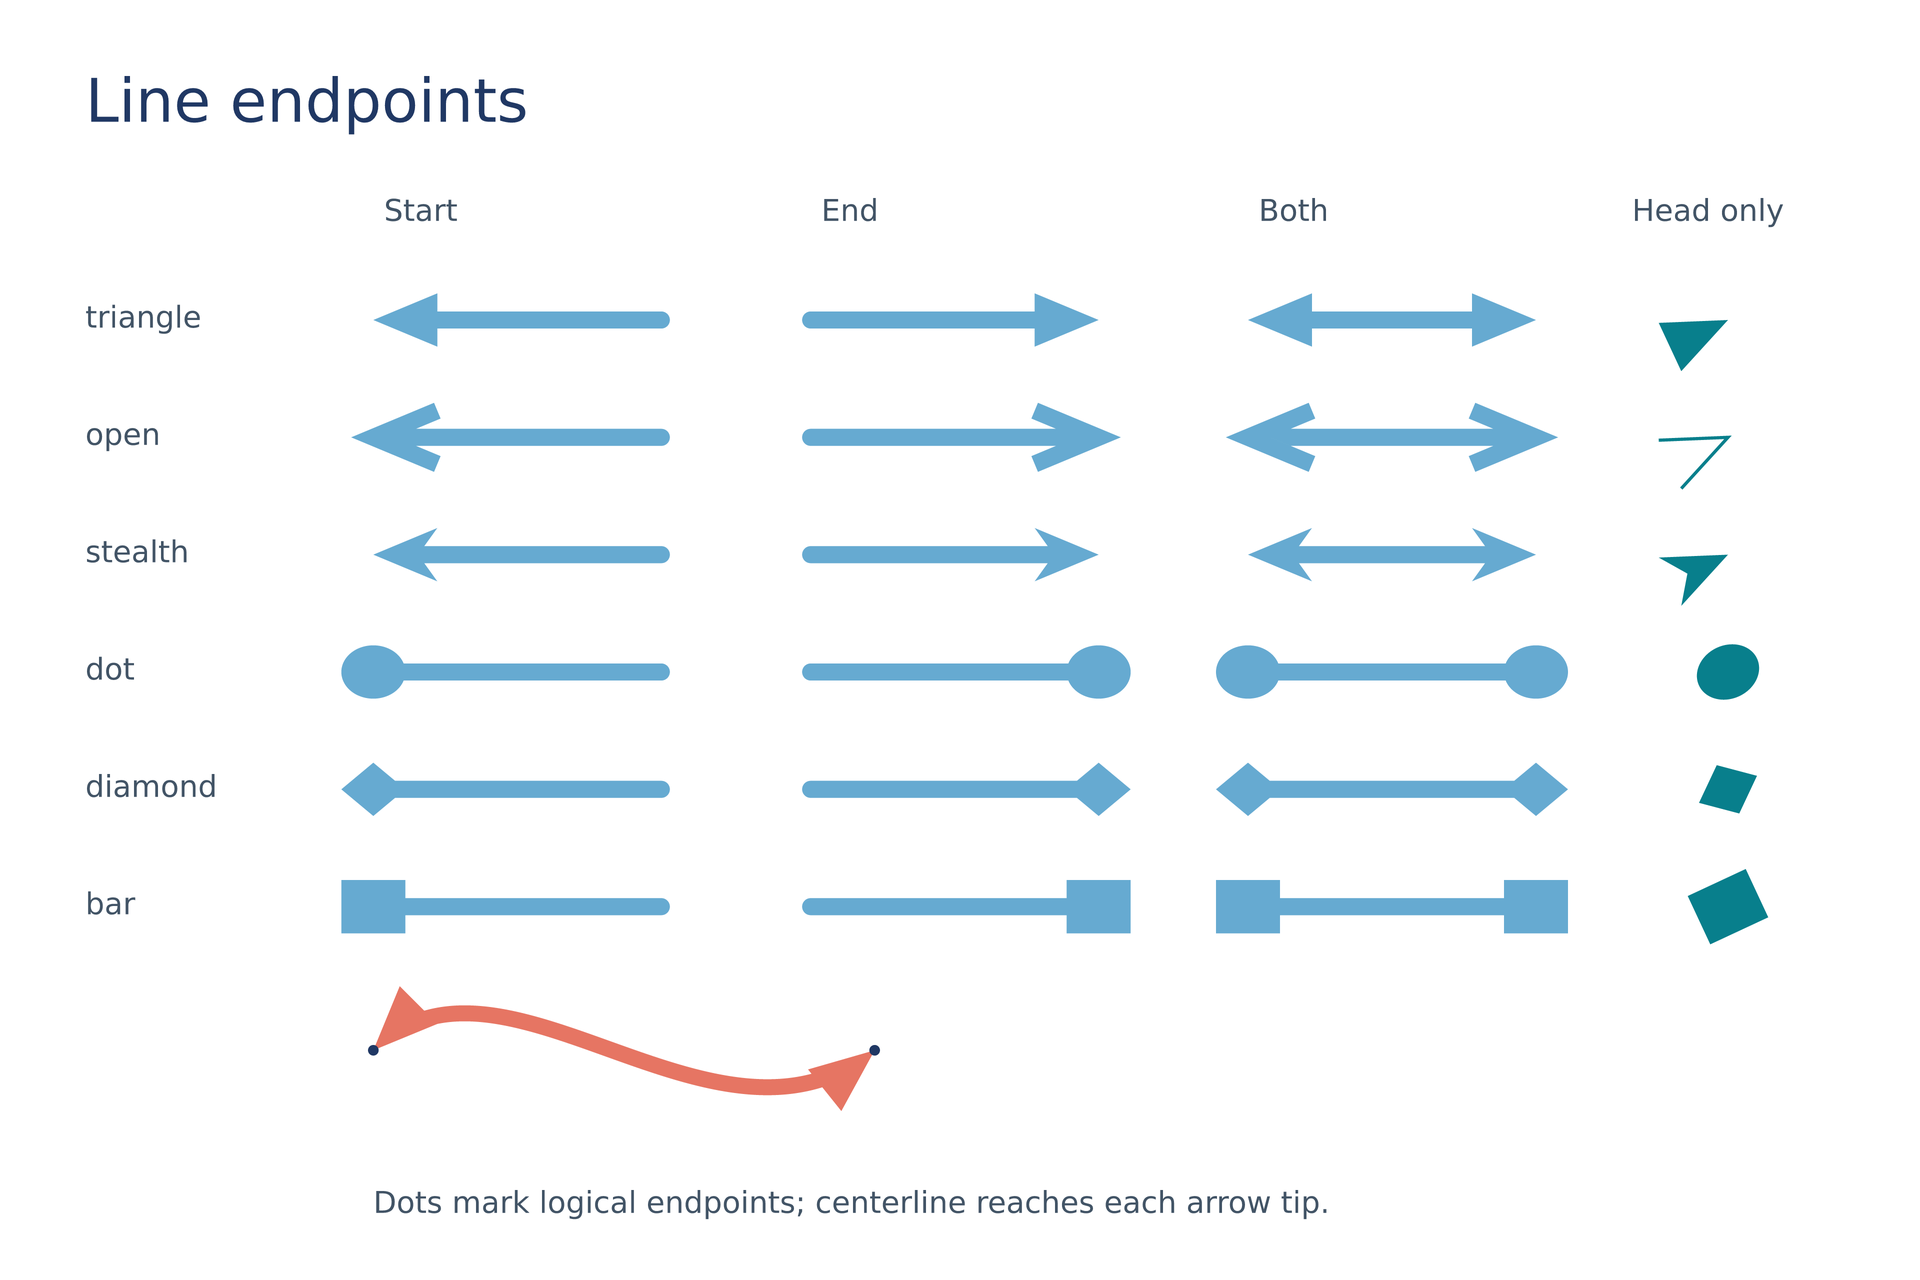
复现命令:laymesh validate examples/gallery/shapes/line-endpoints.lay;laymesh render examples/gallery/shapes/line-endpoints.lay -o line-endpoints.png --dpi 150。
实测:有效,页面 180 × 120 mm;PNG 1063 × 709 px,150 DPI;警告:无。
颜色空间与透明度#
# Gallery: shapes / colors-alphapage=canvas(name="Color spaces and alpha",size=(145mm,95mm),background="#fff")page.add(text("Color spaces and alpha",font_family="DejaVu Sans",font_size=16pt,color="#203864"),offset=(8mm,6mm))# BEGIN DEMOcolors=["#0072b290",rgb(0,114,178,alpha=0.56),hsv(202deg,1,0.7,alpha=0.56),oklch(0.55,0.12,240deg,alpha=0.56)]labels=["HEX + alpha","RGB + alpha","HSV + alpha","OKLCH + alpha"]for i in range(4) { x=8mm+i*34mm page.add(rect(size=(27mm,43mm),fill="#e6f2f3"),offset=(x,25mm)) page.add(rect(size=(27mm,14mm),fill="#bbbbbb"),offset=(x,39mm)) page.add(ellipse(size=(25mm,36mm),fill=colors[i]),offset=(x+1mm,28mm)) page.add(text(labels[i],font_family="DejaVu Sans",font_size=7pt,color="#425466"),offset=(x,72mm))}# END DEMOpage.add(text("One color model across shapes, text, gradients and plots.",font_family="DejaVu Sans",font_size=8pt,color=oklch(0.45,0.1,200deg)),offset=(8mm,84mm))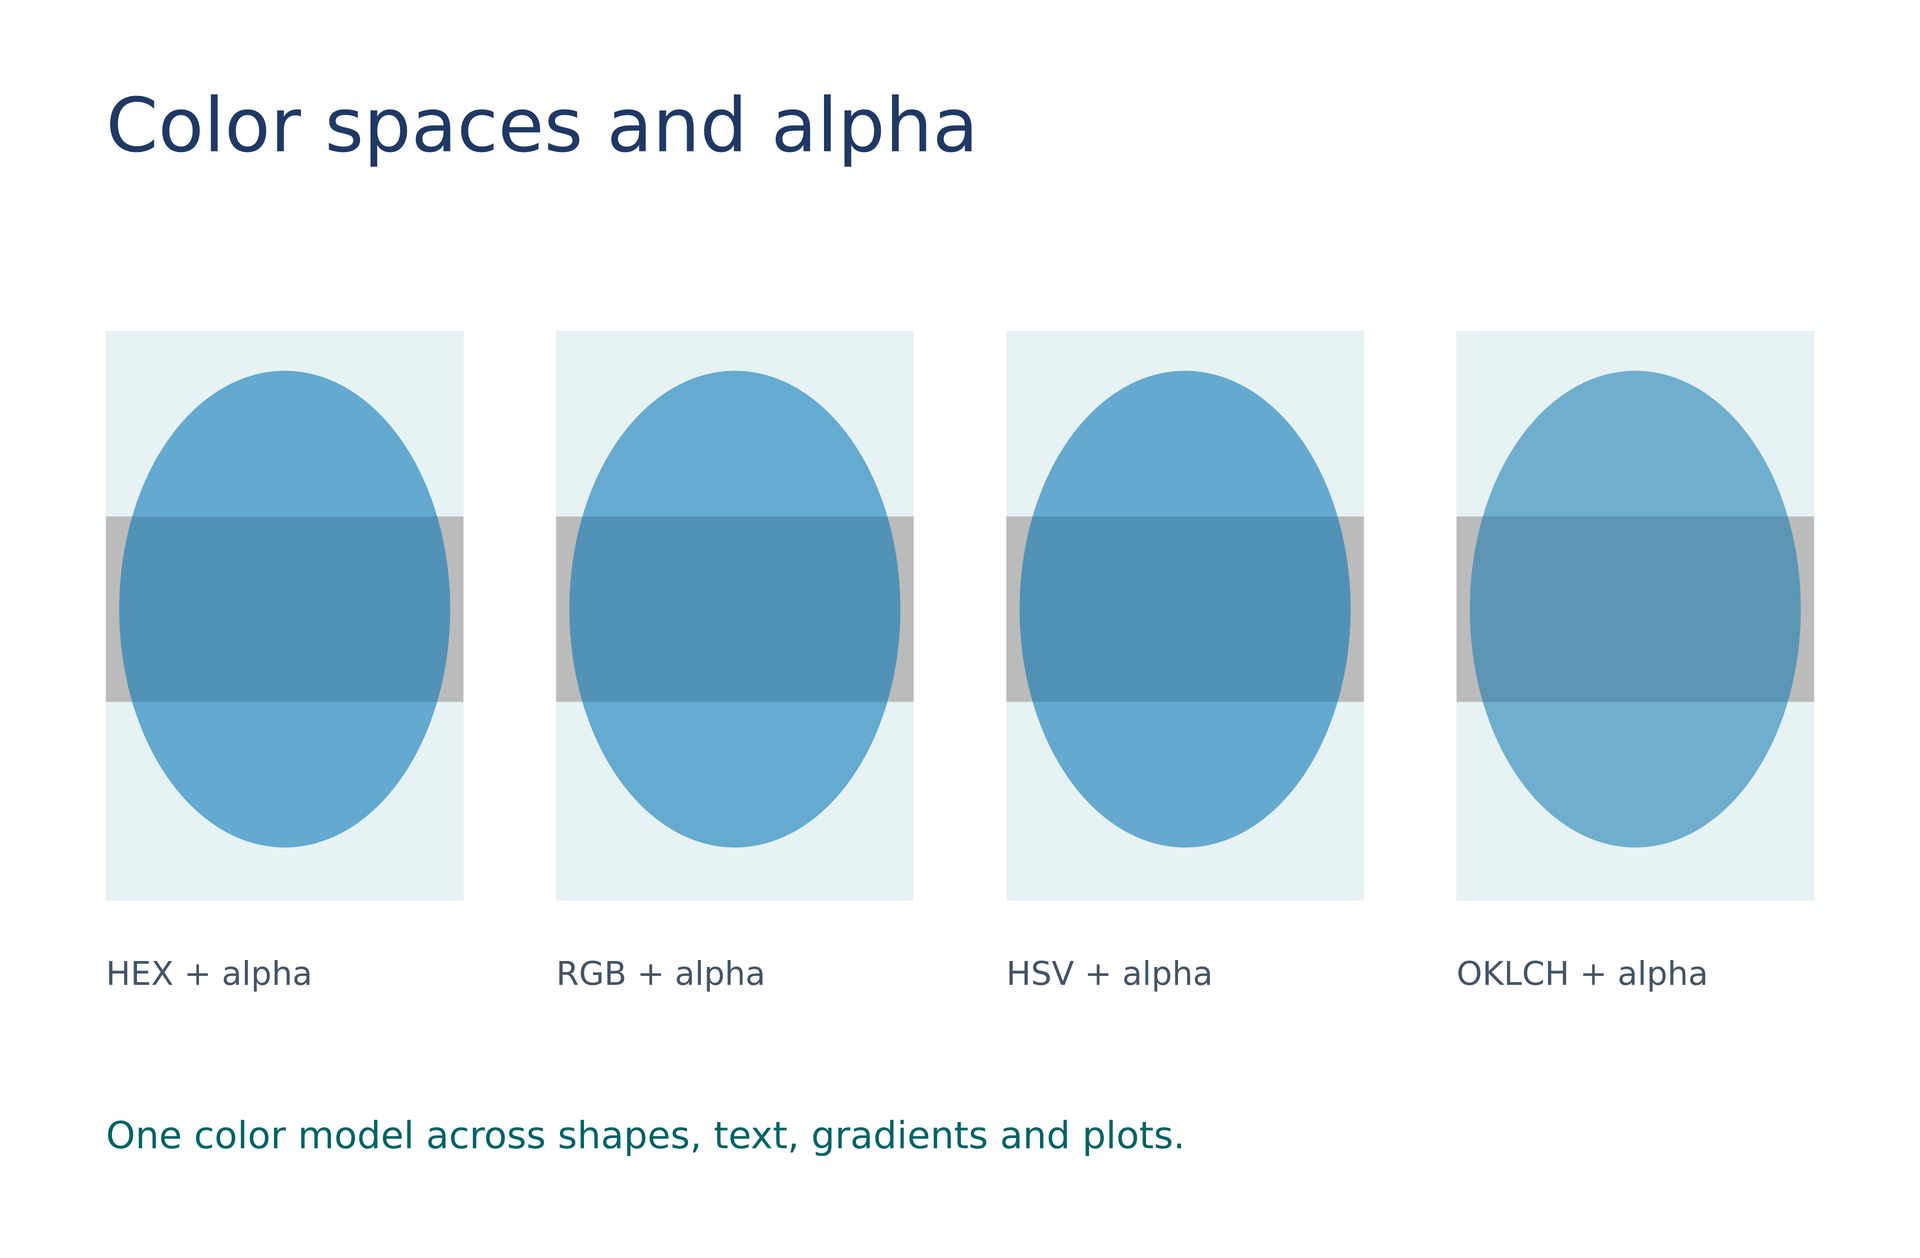
源码:colors-alpha.lay。
复现命令:laymesh validate examples/gallery/shapes/colors-alpha.lay;laymesh render examples/gallery/shapes/colors-alpha.lay -o colors-alpha.png --dpi 150。
实测:有效,页面 145 × 95 mm;PNG 856 × 561 px,150 DPI;警告:无。